Dungeons

Wailing Caverns: Cave Route and Runner Control

Set the cave route and stop runners before they find a side path. The escort is optional.

Buff My Pet Editorial
Classic Hardcore · quest-run prep

Wailing Caverns: Cave Route and Runner Control quest-run prep board

Lock in every pickup before you enter. Follow the four phases to protect bag space, finish objectives in a deliberate order, and leave when the named failure state begins.

Level note: Card levels are quest acceptance minimums, not dungeon level recommendations.

  • RulesetClassic Hardcore Era
  • Quest records7
  • Prep phases4
  • Dungeon mapNot required
  1. Before you travel

    Prerequisites

    Confirm level, faction, shareability, required chains, and optional breadcrumbs before the group forms.

  2. Build the run

    Pickup

    Collect the whole packet before the entrance so one missing quest does not split the group.

    • Leaders of the Fang #914 (opens in a new tab)

      • Horde
      • Quest acceptance · Level 11+
      • Shareability · Shareable
      • Start · Quest giver
      Starts from
      Nara Wildmane
      Location
      Elder Rise, Thunder Bluff
      Pickup timing
      Finish the oasis chain through Nara Wildmane and verify the final step is active before leaving Thunder Bluff.
    • Serpentbloom #962 (opens in a new tab)

      • Horde
      • Quest acceptance · Level 14+
      • Shareability · Shareable
      • Start · Quest giver
      Starts from
      Apothecary Zamah
      Location
      Pools of Vision, Thunder Bluff
      Pickup timing
      Take it before the Barrens trip and plan to collect only plants already on the party route.
    • Smart Drinks #1491 (opens in a new tab)

      • Both
      • Quest acceptance · Level 13+
      • Shareability · Shareable
      • Start · Quest giver
      Starts from
      Mebok Mizzyrix
      Location
      Ratchet, The Barrens
      Pickup timing
      Finish Raptor Horns before run day and accept Smart Drinks before leaving Ratchet.
    • Trouble at the Docks #959 (opens in a new tab)

      • Both
      • Quest acceptance · Level 14+
      • Shareability · Shareable
      • Start · Quest giver
      Starts from
      Crane Operator Bigglefuzz
      Location
      Ratchet docks, The Barrens
      Pickup timing
      Take it before the run, but agree that Mad Magglish gets one planned approach sweep only.
    • Deviate Hides #1486 (opens in a new tab)

      • Both
      • Quest acceptance · Level 13+
      • Shareability · Shareable
      • Start · Quest giver
      Starts from
      Nalpak
      Location
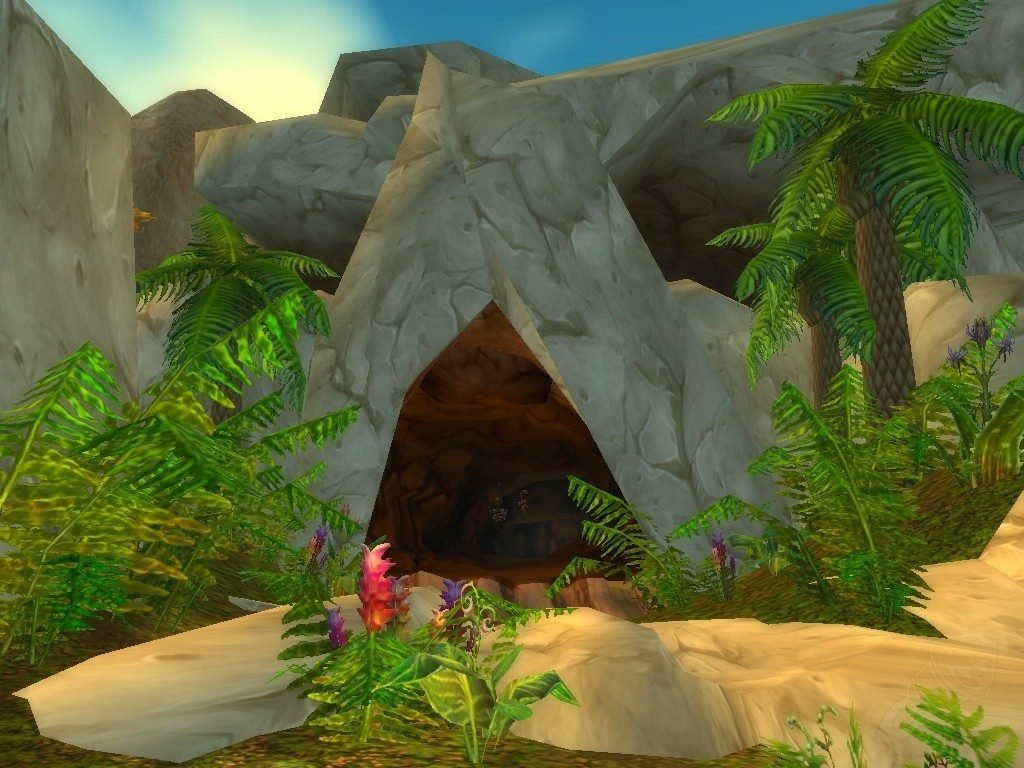
      Hidden quest-giver cave above the Wailing Caverns entrance
      Pickup timing
      Assign one or two hide collectors before entering instead of making every player chase a full stack.
    • Deviate Eradication #1487 (opens in a new tab)

      • Both
      • Quest acceptance · Level 15+
      • Shareability · Shareable
      • Start · Quest giver
      Starts from
      Ebru
      Location
      Hidden quest-giver cave above the Wailing Caverns entrance
      Pickup timing
      Take it for a planned full clear and agree that the party route outranks any short creature count.
    • The Glowing Shard #6981 (opens in a new tab)

      • Both
      • Quest acceptance · Level 15+
      • Shareability · Not shareable
      • Start · Item start
      • Automatic party prompt
      Starts from
      The Glowing Shard
      Location
      Mutanus the Devourer's loot after the Waking Naralex event
      Pickup timing
      Reserve a bag slot and start the item quest only after the final room is secure.
  3. Inside the dungeon

    Inside

    Reserve the named bag space, complete each objective in its area, and obey the failure call before the pull expands.

    Approach objectives

    • Trouble at the Docks #959 (opens in a new tab)
      • Both
      • Quest acceptance · Level 14+
      • Shareability · Shareable
      • Start · Quest giver
      Skip
      Objective
      Find the stealthed Mad Magglish in the approach cave and loot the 99-Year-Old Port.
      Area
      Approach
      Required bag space
      Reserve 1 bag slot
      Bag-space basis
      One free slot for the 99-Year-Old Port.
      Failure state
      Mad Magglish is absent or hidden while his long respawn holds the party in a repopulating approach cave.

    Instance objectives

    • Leaders of the Fang #914 (opens in a new tab)
      • Horde
      • Quest acceptance · Level 11+
      • Shareability · Shareable
      • Start · Quest giver
      Do now
      Objective
      Kill Lord Cobrahn, Lady Anacondra, Lord Pythas, and Lord Serpentis, then loot all four Fanglord gems.
      Area
      Inside
      Required bag space
      Reserve 4 bag slots
      Bag-space basis
      Four free slots for the distinct Fanglord gems.
      Failure state
      The party leaves a Fanglord without looting the matching gem, or a player enters without the active quest.
    • Serpentbloom #962 (opens in a new tab)
      • Horde
      • Quest acceptance · Level 14+
      • Shareability · Shareable
      • Start · Quest giver
      Return later
      Objective
      Collect 10 Serpentbloom from safe nodes along the approach cave and instance route.
      Area
      Inside
      Required bag space
      Reserve 1 bag slot
      Bag-space basis
      One free slot for the Serpentbloom stack.
      Failure state
      Scarce or contested plants tempt a player to leave the cleared line, wait behind, or split from the party.
    • Smart Drinks #1491 (opens in a new tab)
      • Both
      • Quest acceptance · Level 13+
      • Shareability · Shareable
      • Start · Quest giver
      Do now
      Objective
      Collect 6 Wailing Essence from ectoplasms along the approach cave and instance route.
      Area
      Inside
      Required bag space
      Reserve 1 bag slot
      Bag-space basis
      One free slot for the Wailing Essence stack.
      Failure state
      An unfinished prerequisite or short essence count prompts a solo detour through a route the party has left.
    • Deviate Hides #1486 (opens in a new tab)
      • Both
      • Quest acceptance · Level 13+
      • Shareability · Shareable
      • Start · Quest giver
      Do now
      Objective
      Collect 20 Deviate Hides from Deviates along the approach cave and instance route.
      Area
      Inside
      Required bag space
      Reserve 1 bag slot
      Bag-space basis
      One free slot for the Deviate Hide stack.
      Failure state
      Five separate hide counts turn route-native drops into a respawn farm or split the party between loot targets.
    • Deviate Eradication #1487 (opens in a new tab)
      • Both
      • Quest acceptance · Level 15+
      • Shareability · Shareable
      • Start · Quest giver
      Do now
      Objective
      Kill 7 each of Deviate Ravagers, Vipers, Shamblers, and Dreadfangs.
      Area
      Inside
      Required bag space
      No reserved bag slots
      Bag-space basis
      The quest tracks creature kills and reserves no objective-item slot.
      Failure state
      A short creature count pulls the party into a skipped branch or sends one player backward after the clear.

    Final-event objectives

    • The Glowing Shard #6981 (opens in a new tab)
      • Both
      • Quest acceptance · Level 15+
      • Shareability · Not shareable
      • Start · Item start
      • Automatic party prompt
      Bring a group
      Objective
      Complete the optional Naralex event, kill Mutanus the Devourer, loot The Glowing Shard, and start its quest.
      Area
      Final event
      Required bag space
      Reserve 1 bag slot
      Bag-space basis
      One free slot for The Glowing Shard before starting the item quest.
      Failure state
      The party starts the single-attempt Naralex event with low resources or an uncleared escort route and cannot recover after a wipe.
  4. After the clear

    Turn-in

    Finish the hand-in route, keep follow-ups visible, and use the abandon call when the run cannot complete the quest safely.

    • Leaders of the Fang #914 (opens in a new tab)

      • Horde
      • Quest acceptance · Level 11+
      • Shareability · Shareable
      • Start · Quest giver
      Turn in to
      Nara Wildmane
      Location
      Elder Rise, Thunder Bluff
      Abandon call
      Confirm every gem before moving on. If one is missed, leave with the group and never split or backtrack through respawns.
    • Serpentbloom #962 (opens in a new tab)

      • Horde
      • Quest acceptance · Level 14+
      • Shareability · Shareable
      • Start · Quest giver
      Turn in to
      Apothecary Zamah
      Location
      Pools of Vision, Thunder Bluff
      Abandon call
      Take only visible nodes on the shared route. Leave with the group when short and finish on another clean run.
    • Smart Drinks #1491 (opens in a new tab)

      • Both
      • Quest acceptance · Level 13+
      • Shareability · Shareable
      • Start · Quest giver
      Turn in to
      Mebok Mizzyrix
      Location
      Ratchet, The Barrens
      Abandon call
      Collect only on the shared route. If the quest is locked or incomplete, leave with the group and finish it later.
    • Trouble at the Docks #959 (opens in a new tab)

      • Both
      • Quest acceptance · Level 14+
      • Shareability · Shareable
      • Start · Quest giver
      Turn in to
      Crane Operator Bigglefuzz
      Location
      Ratchet docks, The Barrens
      Abandon call
      Make one grouped sweep. If he is not immediately present, enter the instance together and leave the port for another run.
    • Deviate Hides #1486 (opens in a new tab)

      • Both
      • Quest acceptance · Level 13+
      • Shareability · Shareable
      • Start · Quest giver
      Turn in to
      Nalpak
      Location
      Hidden quest-giver cave above the Wailing Caverns entrance
      Abandon call
      Let the designated collectors take safe route drops. Leave short rather than farming, waiting, or moving backward.
    • Deviate Eradication #1487 (opens in a new tab)

      • Both
      • Quest acceptance · Level 15+
      • Shareability · Shareable
      • Start · Quest giver
      Turn in to
      Ebru
      Location
      Hidden quest-giver cave above the Wailing Caverns entrance
      Abandon call
      Accept partial progress when the safe route is done. Never extend or split the run for the last kills.
    • The Glowing Shard #6981 (opens in a new tab)

      • Both
      • Quest acceptance · Level 15+
      • Shareability · Not shareable
      • Start · Item start
      • Automatic party prompt
      Turn in to
      Falla Sagewind
      Location
      Top of the Wailing Caverns mountain, after speaking with Sputtervalve in Ratchet
      Abandon call
      Begin only with a full, resourced, agreeing party and a cleared escort path. Otherwise exit after the Fanglords and return on a fresh reset.

Map the cave before the bosses

Wailing Caverns is a cave network with runners, patrols, and split paths. Bring water, bandages, and bag space. Choose a full clear or conservative partial before the first pull.

Keep the cave from widening

  • Mark, interrupt, and decide who starts the next pull. Lady Anacondra, Lord Serpentis, and the other Druid bosses bring sleep or heals that punish a group with no control plan.

  • Pull back when the cave allows it. Control or finish runners before the next room joins the pull.

  • Reset before boss rooms: drink, mark, and make the opening clean.

  • Treat the escort and objective progress as optional when the route gets messy. Leave them for a clean return run.

Keep the reset lane clear

Once the group loses the reset lane, the cave can widen a pull quickly. Stop at transitions, agree on the next room, then move together.

Leave with a clean route

Take quest credit when the cave route stays clean. Leave when the reset lane breaks.

By class

Class angles from this page

Druid

Use Druid flexibility for a quick peel, healing, and movement when the formation bends. Keep the route together through each reset.

Hunter

Keep pet movement deliberate and Trap the hallway pull before it spreads. Use a chosen target and stance through every cave transition.

Priest

Line of sight and runner priority give Priest room to heal. Ask for a clear lane when the group spreads through corners or leaves dangerous targets alive.

Warrior

Set the pull location before contact and drag mobs backward when the cave allows it. Keep a retreat lane open before moving into the next tangle of sight lines.

Related articles
Last updated