Zones

Dun Morogh

Leave Coldridge with the starter valley finished, treat the Frostmane caves as separate returns, and group before Vagash or Mangeclaw.

Buff My Pet Editorial
Classic Hardcore · safety route

Quest safety dossier

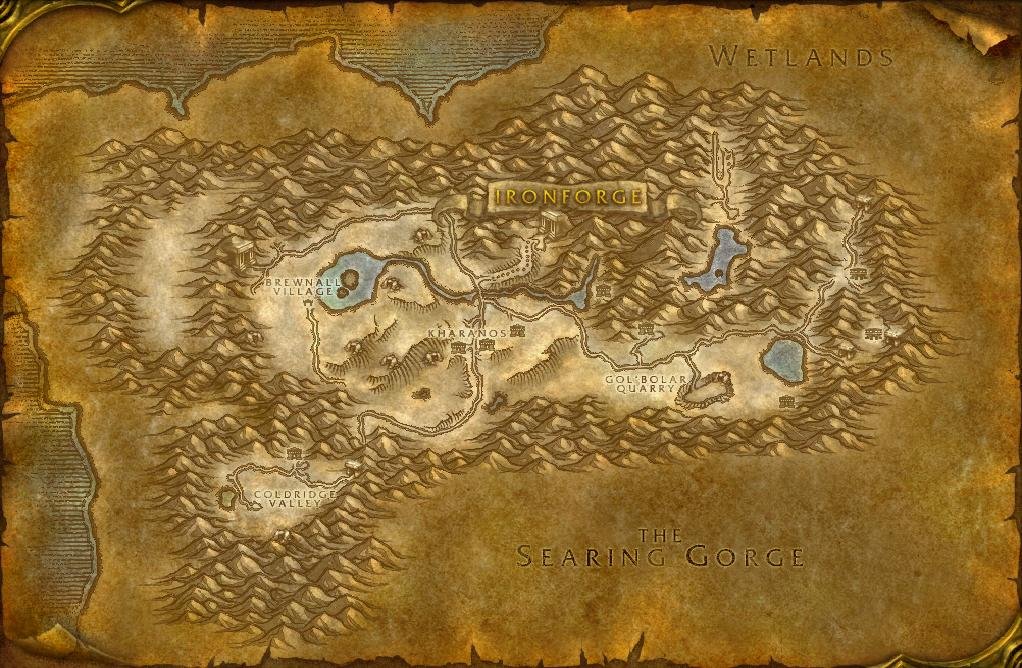
The annotated Classic map shows approximate quest-risk locations and safe anchors. Callouts show our conservative verdict, safety level, and first risk. The checklist carries the full failure state and exit call.

Swipe or scroll sideways to inspect the full map.

Map guidance

The Classic zone map is decorative. Numbered markers match the cards below; every card names its explicitly reviewed map anchor and approximate relative position.

Map anchors
  • Anvilmar (safe hub)
  • Kharanos (safe hub)
  • Brewnall Village (safe hub)
  • Grizzled Den (cave)
  • Frostmane Hold (cave)
  • Shimmer Ridge (danger area)
  • Old Icebeard's Cave (cave)
  • Amberstill Ranch (safe hub)
  • Vagash Grounds (danger area)
  • Gol'Bolar Quarry (danger area)
  • Lost Pilot (danger area)
  • Loch Modan Gate (road gate)

Annotated Classic zone map. Quest callouts give a short checkpoint label, verdict, safety level, and first listed risk; +N means the card lists more risks. Marker positions identify approximate quest-risk areas, not exact spawn points. Connection relationships are not drawn as navigation lines. Finish Coldridge Valley before Kharanos. Treat the Grizzled Den, Shimmer Ridge, Frostmane Hold, Old Icebeard's cave, Amberstill Ranch, Gol'Bolar Quarry, and the eastern pilot chain as separate trips. Checkpoint markers are approximate risk areas, not exact spawns or safe paths. Confirm exact navigation in game. Numbered markers match the ordered checklist below.

  • Do now
  • Return later
  • Bring a group
  • Skip
  1. Checkpoint 1

    8+ · Alliance

    The Grizzled Den

    Return later
    Risk
    CaveRespawn
    Map position
    Near Grizzled Den · marker 1 at approximately 47% from the left and 64% from the top
    Failure state
    A wendigo respawns behind you while another blocks the bend toward the cave mouth.
    Exit call
    Collect near the first chambers and turn out when the last cleared bend stops being empty.
    Back to map
  2. Checkpoint 2

    10+ · Alliance

    The Perfect Stout

    Do now
    Risk
    Dense campRespawn
    Map position
    Near Shimmer Ridge · marker 2 at approximately 28% from the left and 34% from the top
    Failure state
    A Frostmane Seer or warrior joins while the nearest basket sits deeper inside the camp.
    Exit call
    Take exposed Shimmerweed baskets from the outer ridge and reset toward Brewnall instead of crossing a second camp.
    Back to map
  3. Checkpoint 3

    10+ · Alliance

    Frostmane Hold

    Skip
    Risk
    CaveRespawn
    Map position
    Near Frostmane Hold · marker 3 at approximately 27% from the left and 59% from the top
    Failure state
    A headhunter respawns behind you while the scouting objective still requires a deeper cave turn.
    Exit call
    Skip the deep scout on a solo 1-10 pass. If you enter later, leave on the first back-respawn.
    Back to map
  4. Checkpoint 4

    12+ · Alliance

    Tundra MacGrann's Stolen Stash

    Skip
    Risk
    CavePatrol
    Map position
    Near Old Icebeard's Cave · marker 4 at approximately 39% from the left and 73% from the top
    Failure state
    Old Icebeard returns to the cave while the stash interaction or another cave occupant delays the exit.
    Exit call
    Skip the timing trick on a solo starting-zone pass; no reward is worth being pinned behind the cave patrol.
    Back to map
  5. Checkpoint 5

    12+ · Alliance

    Protecting the Herd

    Bring a group
    Risk
    Dense campPatrol
    Map position
    Near Vagash Grounds · marker 5 at approximately 66% from the left and 35% from the top
    Failure state
    Vagash survives the opening control while another beast or nearby threat closes the downhill retreat.
    Exit call
    Bring a group, clear the retreat first, and abandon the pull before the route back to Amberstill narrows.
    Back to map
  6. Checkpoint 6

    11+ · Alliance

    Gol'Bolar Quarry troggs

    Return later
    Risk
    Dense campRunners
    Map position
    Near Gol'Bolar Quarry · marker 6 at approximately 74% from the left and 64% from the top
    Failure state
    A wounded trogg runs into the quarry pocket while another pack occupies the ramp back to camp.
    Exit call
    Work from the quarry rim inward and reset to camp instead of following a runner below the last clear ramp.
    Back to map
  7. Checkpoint 7

    11+ · Alliance

    The Lost Pilot and A Pilot's Revenge

    Bring a group
    Risk
    TravelPatrol
    Map position
    Near Lost Pilot · marker 7 at approximately 85% from the left and 29% from the top
    Failure state
    Mangeclaw holds the fight while another bear or long eastern recovery route removes the safe reset.
    Exit call
    Bring a group for the revenge step and return toward Gol'Bolar before taking another eastern fight.
    Back to map
Before this route

Prepare the failure states

Read the lessons that match this map's terrain, group pressure, travel, and reset risks.

Levels 1-10

Finish Coldridge Valley before moving to Kharanos. Dun Morogh's roads leave room to reset, but the wendigo and Frostmane caves, snowy camps, and eastern named targets do not.

Keep the western caves optional

The Grizzled Den can end in the first controlled chambers. Frostmane Hold asks for a deeper scout, while Tundra MacGrann's Stolen Stash depends on a cave patrol window. Neither needs to close a solo starting-zone pass.

Finish the east with help

Protecting the Herd and A Pilot's Revenge are group stops, not proof that the zone is unfinished. Separate them with a repair and bag-space reset in Kharanos or Gol'Bolar.

Where next

Continue to Loch Modan after level 10. Use the eastern road only after training, repairs, and emptying your bags, then make Thelsamar the reset point for each separate trip.
Related articles
Last updated