Do next
Open route
Open the current route reference
The current level and unfinished checklist decide this action.
Choose a race or class first. Follow the next safe preparation step, keep one local character, and test talent points against the full Classic tree.
Race sets the native starting area. Class sets the available pairings and the guide advice. Choose either one first.
Choose a valid race and class, customize the route, then save it for this browser.
No character name or note is stored. Clearing browser site data removes the journey.Choose a race and class in either order.

Set the current level to reveal the next useful part of the route.
Choose a character before selecting a map.
Your changes stay in this session until you save.
The current level and unfinished checklist decide this action.
Map availability is filtered by level and faction. A selected map records your plan; it is never chosen automatically.
Available maps appear after you set the current level.
Browse safety mapsChoose a character to see its level-band guide.
Open class guideUse the route, class, and survival references before the next pull.
Open survival guidesMark the references you reviewed. Progress saves with the character.
Open the annotated safety map
The handoff comes from the selected zone's reviewed discovery route.
The Journal remains usable while this local data loads.
Set Current level above to 10 or higher, then add points in legal order. The budget updates while you type.
One point matches level 10; all 51 match level 60. Custom calculator picks reset on reload and never replace your saved character.
Talent points unlock at level 10.
The character matcher is unavailable. Every starting map, handoff, class unlock, and dungeon board remains available below.
{"classes": [{"class_quest_label": "Class quest unlocks", "class_quest_route": "/classes/druid/quests/", "difficulty": "Long road to Cat Form", "dungeon_route": "/classes/druid/dungeons/", "early_label": "Levels 1\u201311", "early_tip": "Wrath, Moonfire, wand, and a lot of sitting. Bear Form at 10 gives the class its first answer to melee.", "early_title": "Reach Bear Form", "key": "druid", "leveling_bands": [{"copy": "Wrath, Moonfire, wand, and a lot of sitting. Bear Form at 10 gives the class its first answer to melee.", "level_label": "Levels 1\u201311", "level_max": 11, "level_min": 1, "title": "Reach Bear Form"}, {"copy": "This is when you are weakest. You are running in a new form that is less tanky than Bear. The rest of the kit is not finished.", "level_label": "Levels 12\u201323", "level_max": 23, "level_min": 12, "title": "The kit is not finished"}, {"copy": "Feral Charge at 30 makes a melee pull recoverable. Roots and Travel make room outdoors.", "level_label": "Levels 24\u201339", "level_max": 39, "level_min": 24, "title": "Feral Charge arrives"}, {"copy": "Barkskin at 44 buys the heal. Pick Bear, Cat, caster, or Travel before you open.", "level_label": "Levels 40\u201360", "level_max": 60, "level_min": 40, "title": "Four jobs, one pull"}], "milestone_ids": ["starting-map", "early-zone", "class-guide", "talent-route", "class-quests", "professions", "dungeon-jobs"], "name": "Druid", "preparation_actions": [{"id": "class-guide", "route": "/classes/druid/", "title": "Druid class guide"}, {"id": "talent-route", "route": "/guides/druid/talents/", "title": "Druid talents and training"}, {"id": "class-quests", "route": "/classes/druid/quests/", "title": "Druid class quest unlocks"}, {"id": "professions", "route": "/classes/druid/professions/", "title": "Professions for Druid"}, {"id": "dungeon-jobs", "route": "/classes/druid/dungeons/", "title": "Dungeon jobs for Druid"}], "profession_route": "/classes/druid/professions/", "race_keys": ["night-elf", "tauren"], "recommended_races": {"night-elf": "Shadowmeld provides an outdoor reset. Nature resistance is a small bonus.", "tauren": "War Stomp freezes the room for two seconds. Endurance adds 5% HP. Pair either with Bear Form and the melee reset has room to breathe."}, "role": "Shapeshift survivor", "route": "/classes/druid/", "spec": "Feral", "summary": "Bear Form carries a slow early run. Cat Form brings better damage and mobility at 20.", "talent_planner_path": "/assets/data/journey-talents/druid.json?v=1.3.3", "talent_route": "/guides/druid/talents/"}, {"class_quest_label": "Class quest unlocks", "class_quest_route": "/classes/hunter/quests/", "difficulty": "Fast and forgiving", "dungeon_route": "/classes/hunter/dungeons/", "early_label": "Levels 1\u20139", "early_tip": "Hunter is at its weakest here. Rogue wears leather too and has more early damage. Paladin is slower and compensates with armor and healing. Warrior has a shield and mail, and does well when its weapons stay updated.", "early_title": "Without a pet, Hunter feels like half a class", "key": "hunter", "leveling_bands": [{"copy": "Hunter is at its weakest here. Rogue wears leather too and has more early damage. Paladin is slower and compensates with armor and healing. Warrior has a shield and mail, and does well when its weapons stay updated.", "level_label": "Levels 1\u20139", "level_max": 9, "level_min": 1, "title": "Without a pet, Hunter feels like half a class"}, {"copy": "The class starts feeling proper. Avoid aggroing extra mobs. Handling multiple packs still takes preparation. You only have a few traps, very little crowd control, some melee skills, and pet-management keybinds. Macros improve pet control by a large margin.", "level_label": "Levels 10\u201323", "level_max": 23, "level_min": 10, "title": "Not enough tools under the belt"}, {"copy": "In the open world, you feel invincible. Runners, adds, and cramped camps punish Hunters who turn off too much of their brains while leveling. Dungeons require careful pet management. One bad aggro can wipe the group or get the tank killed.", "level_label": "Levels 24\u201339", "level_max": 39, "level_min": 24, "title": "Dead zone clutter"}, {"copy": "Damage is high and downtime is low. Technically, Hunter should never die here. The world is not of the same opinion. The biggest threats are overconfidence and game knowledge. Mistakes are waiting with each pull, and dungeons become more serious. This is also when Hunter is at its best with good gear, a tanky pet, and the full toolkit under its belt.", "level_label": "Levels 40\u201360", "level_max": 60, "level_min": 40, "title": "Speed greed"}], "milestone_ids": ["starting-map", "early-zone", "class-guide", "talent-route", "class-quests", "professions", "dungeon-jobs"], "name": "Hunter", "preparation_actions": [{"id": "class-guide", "route": "/classes/hunter/", "title": "Hunter class guide"}, {"id": "talent-route", "route": "/guides/hunter/talents/", "title": "Hunter talents and training"}, {"id": "class-quests", "route": "/classes/hunter/quests/", "title": "Hunter class quest unlocks"}, {"id": "professions", "route": "/classes/hunter/professions/", "title": "Professions for Hunter"}, {"id": "dungeon-jobs", "route": "/classes/hunter/dungeons/", "title": "Dungeon jobs for Hunter"}], "profession_route": "/classes/hunter/professions/", "race_keys": ["dwarf", "night-elf", "orc", "tauren", "troll"], "recommended_races": {"dwarf": "Stoneform is great. Do not forget that as a Dwarf, you always have a bear as a pet. Mandatory requirement.", "night-elf": "Great animations, the best starting zones, and immersive lore.", "orc": "Beefy, with a nice bonus to damage and pet damage.", "troll": "Great self-sustain and nice bow animations."}, "role": "Ranged solo king", "route": "/classes/hunter/", "spec": "Beast Mastery", "summary": "Beast Mastery Hunter is a smooth leveler. The pet gets tanky, allowing you to kill elites and mobs up to five levels above you.", "talent_planner_path": "/assets/data/journey-talents/hunter.json?v=1.3.3", "talent_route": "/guides/hunter/talents/"}, {"class_quest_label": "Class quest unlocks", "class_quest_route": "/classes/mage/quests/", "difficulty": "Strong control, strict mana", "dungeon_route": "/classes/mage/dungeons/", "early_label": "Levels 1\u201311", "early_tip": "Stay with green single targets before Frost Nova arrives at 10. Frostbolt takes time to cast, and early mana recovery leaves little room for repeated melee hits.", "early_title": "Levels 1\u201311", "key": "mage", "leveling_bands": [{"copy": "Stay with green single targets before Frost Nova arrives at 10. Frostbolt takes time to cast, and early mana recovery leaves little room for repeated melee hits.", "level_label": "Levels 1\u201311", "level_max": 11, "level_min": 1, "title": "Levels 1\u201311"}, {"copy": "By 24, you have Polymorph, Frost Nova, Blink, and Counterspell. Practice choosing one answer early instead of spending several after the pull has reached melee. Trying to finish one more Frostbolt while taking hits is where control starts to collapse.", "level_label": "Levels 12\u201323", "level_max": 23, "level_min": 12, "title": "Levels 12\u201323"}, {"copy": "Keep Cold Snap ready from 30 onward when the first use of Frost Nova fails to settle the pull. Level in the open ground of STV, Arathi, and Desolace, where patrols remain visible and Blink has a clear landing. Caves remove that space.", "level_label": "Levels 24\u201339", "level_max": 39, "level_min": 24, "title": "Levels 24\u201339"}, {"copy": "From 40 onward, cast Ice Barrier before entering a camp where a broken Frost Nova or unexpected add can reach you. Blizzard farming becomes practical after 50. Start with small packs on clear ground and stop increasing the pull size once cast pushback interrupts the plan.", "level_label": "Levels 40\u201360", "level_max": 60, "level_min": 40, "title": "Levels 40\u201360"}], "milestone_ids": ["starting-map", "early-zone", "class-guide", "talent-route", "class-quests", "professions", "dungeon-jobs"], "name": "Mage", "preparation_actions": [{"id": "class-guide", "route": "/classes/mage/", "title": "Mage class guide"}, {"id": "talent-route", "route": "/guides/mage/talents/", "title": "Mage talents and training"}, {"id": "class-quests", "route": "/classes/mage/quests/", "title": "Mage class quest unlocks"}, {"id": "professions", "route": "/classes/mage/professions/", "title": "Professions for Mage"}, {"id": "dungeon-jobs", "route": "/classes/mage/dungeons/", "title": "Dungeon jobs for Mage"}], "profession_route": "/classes/mage/professions/", "race_keys": ["human", "gnome", "undead", "troll"], "recommended_races": {"gnome": "A root or net in melee removes the space Frost needs for another cast. Gnome can clear it with Escape Artist, and the extra Intellect stays useful throughout the run.", "human": "Mage drinks often enough for the Human Spirit bonus to matter over a full leveling route.", "troll": "Use Berserking as a Troll when the target has reached melee and the next cast needs to finish the pull.", "undead": "Fear is dangerous because it removes every decision about position. An Undead Mage can break it with Will of the Forsaken, then use Cannibalize after a humanoid pull and save the conjured food."}, "role": "Ranged control caster", "route": "/classes/mage/", "spec": "Frost", "summary": "Most Mage deaths begin after another pull starts with low mana or the Mage keeps casting while a target is already in melee.", "talent_planner_path": "/assets/data/journey-talents/mage.json?v=1.3.3", "talent_route": "/guides/mage/talents/"}, {"class_quest_label": "Class quest unlocks", "class_quest_route": "/classes/paladin/quests/", "difficulty": "Slow and durable", "dungeon_route": "/classes/paladin/dungeons/", "early_label": "Levels 1\u201311", "early_tip": "Fight green single targets and recover with food whenever possible. Casting Holy Light after every fight spends the mana you may need when the next pull changes.", "early_title": "Levels 1\u201311", "key": "paladin", "leveling_bands": [{"copy": "Fight green single targets and recover with food whenever possible. Casting Holy Light after every fight spends the mana you may need when the next pull changes.", "level_label": "Levels 1\u201311", "level_max": 11, "level_min": 1, "title": "Levels 1\u201311"}, {"copy": "By 24, Hammer of Justice, Lay on Hands, and Divine Protection are all available. Learn which one the pull needs before spending more than one cooldown, and use Deadmines or Shadowfang Keep to look for the next weapon upgrade.", "level_label": "Levels 12\u201323", "level_max": 23, "level_min": 12, "title": "Levels 12\u201323"}, {"copy": "Drink after every couple of pulls so Holy Light remains available. Caster-heavy camps take longer to control and spend more mana, so choose another route whenever one is available.", "level_label": "Levels 24\u201339", "level_max": 39, "level_min": 24, "title": "Levels 24\u201339"}, {"copy": "Plate improves the normal melee route after 40, and Blackrock Depths can provide the next gear upgrades when the group is disciplined. In Eastern Plaguelands, treat three-caster pulls as a serious threat while Lay on Hands is cooling down.", "level_label": "Levels 40\u201360", "level_max": 60, "level_min": 40, "title": "Levels 40\u201360"}], "milestone_ids": ["starting-map", "early-zone", "class-guide", "talent-route", "class-quests", "professions", "dungeon-jobs"], "name": "Paladin", "preparation_actions": [{"id": "class-guide", "route": "/classes/paladin/", "title": "Paladin class guide"}, {"id": "talent-route", "route": "/guides/paladin/talents/", "title": "Paladin talents and training"}, {"id": "class-quests", "route": "/classes/paladin/quests/", "title": "Paladin class quest unlocks"}, {"id": "professions", "route": "/classes/paladin/professions/", "title": "Professions for Paladin"}, {"id": "dungeon-jobs", "route": "/classes/paladin/dungeons/", "title": "Dungeon jobs for Paladin"}], "profession_route": "/classes/paladin/professions/", "race_keys": ["human", "dwarf"], "recommended_races": {"dwarf": "Bleeds, poisons, and diseases can keep a Paladin in the healing loop long after the mob dies. Dwarf can clear them with Stoneform and return to the route.", "human": "Human stays close to the ordinary Retribution plan. Extra sword and mace skill supports the two-handed route, while Spirit helps during the recovery between pulls."}, "role": "Armored melee with emergency healing", "route": "/classes/paladin/", "spec": "Retribution", "summary": "Retribution handles routine melee fights. Keep enough mana for Holy Light and enter every difficult pull with the long cooldowns available.", "talent_planner_path": "/assets/data/journey-talents/paladin.json?v=1.3.3", "talent_route": "/guides/paladin/talents/"}, {"class_quest_label": "Class quest unlocks", "class_quest_route": "/classes/priest/quests/", "difficulty": "Safe with disciplined mana", "dungeon_route": "/classes/priest/dungeons/", "early_label": "Levels 1\u201311", "early_tip": "Buy or craft a Lesser Magic Wand as early as possible and use small Smite casts before it is ready. Train Power Word Shield at 6 for harder fights, then replace the first wand with Greater Magic Wand at 13.", "early_title": "Before the wand carries", "key": "priest", "leveling_bands": [{"copy": "Buy or craft a Lesser Magic Wand as early as possible and use small Smite casts before it is ready. Train Power Word Shield at 6 for harder fights, then replace the first wand with Greater Magic Wand at 13.", "level_label": "Levels 1\u201311", "level_max": 11, "level_min": 1, "title": "Before the wand carries"}, {"copy": "Put Power Word Shield and Shadow Word Pain on the pull, then let the stronger wand finish it. Use Mind Blast when damage needs to arrive quickly and keep Psychic Scream for open ground. Spirit Tap rewards the killing blow and reduces how often you drink.", "level_label": "Levels 12\u201323", "level_max": 23, "level_min": 12, "title": "The cheap loop"}, {"copy": "In dungeons, use Dispel Magic and Cure Disease before the healer is forced to recover the same damage twice. Use Fade after healing draws threat. Cast Mana Burn after the tank has secured the pull and the group has time to control the caster. Dungeon gear can carry the healing set through this bracket.", "level_label": "Levels 24\u201339", "level_max": 39, "level_min": 24, "title": "Utility arrives"}, {"copy": "Power Infusion at 45 strengthens spell damage and healing for fifteen seconds, so use it before the emergency heal or damage window begins. Caster packs become more common after 50. Choose routes where elites remain optional and Psychic Scream has clear ground.", "level_label": "Levels 40\u201360", "level_max": 60, "level_min": 40, "title": "Caster density"}], "milestone_ids": ["starting-map", "early-zone", "class-guide", "talent-route", "class-quests", "professions", "dungeon-jobs"], "name": "Priest", "preparation_actions": [{"id": "class-guide", "route": "/classes/priest/", "title": "Priest class guide"}, {"id": "talent-route", "route": "/guides/priest/talents/", "title": "Priest talents and training"}, {"id": "class-quests", "route": "/classes/priest/quests/", "title": "Priest class quest unlocks"}, {"id": "professions", "route": "/classes/priest/professions/", "title": "Professions for Priest"}, {"id": "dungeon-jobs", "route": "/classes/priest/dungeons/", "title": "Dungeon jobs for Priest"}], "profession_route": "/classes/priest/professions/", "race_keys": ["human", "dwarf", "night-elf", "undead", "troll"], "recommended_races": {"dwarf": "Fear can scatter a dungeon group into the rest of the room. A Dwarf Priest can prevent one with Fear Ward and clear a bleed, poison, or disease through Stoneform.", "human": "The Human Spirit bonus fits a shield-and-wand route that depends on steady recovery between pulls.", "troll": "A difficult pull sometimes comes down to one heal landing in time. Troll can use Berserking for that cast.", "undead": "An Undead Priest can break Fear or Charm with Will of the Forsaken, then use Cannibalize after a humanoid fight and save mana for the next pull."}, "role": "Shield-and-wand caster with healing", "route": "/classes/priest/", "spec": "Discipline", "summary": "Discipline keeps ordinary pulls cheap so the mana bar remains ready for the fight that changes.", "talent_planner_path": "/assets/data/journey-talents/priest.json?v=1.3.3", "talent_route": "/guides/priest/talents/"}, {"class_quest_label": "Class quest unlocks", "class_quest_route": "/classes/rogue/quests/", "difficulty": "Fast kills, thin margins", "dungeon_route": "/classes/rogue/dungeons/", "early_label": "Levels 1\u201311", "early_tip": "Spend the early levels scouting from Stealth and fighting green or yellow single targets. Train Sap at 10 and remove one valid humanoid from the opener. Keep the main-hand weapon current throughout this bracket.", "early_title": "Levels 1\u201311", "key": "rogue", "leveling_bands": [{"copy": "Spend the early levels scouting from Stealth and fighting green or yellow single targets. Train Sap at 10 and remove one valid humanoid from the opener. Keep the main-hand weapon current throughout this bracket.", "level_label": "Levels 1\u201311", "level_max": 11, "level_min": 1, "title": "Levels 1\u201311"}, {"copy": "By 22, Sap, Vanish, and Kick cover the main control decisions. Practice the Sap target and Kick timing before entering Deadmines or Shadowfang Keep, where a weapon upgrade can change the rest of the route.", "level_label": "Levels 12\u201323", "level_max": 23, "level_min": 12, "title": "Levels 12\u201323"}, {"copy": "Keep poisons active through this bracket and learn Cheap Shot at 26. Take Blade Flurry at 36 in this route and spend those fifteen seconds on a planned second target. STV pirates and Hillsbrad humanoids also make pickpocketing worth the detour.", "level_label": "Levels 24\u201339", "level_max": 39, "level_min": 24, "title": "Levels 24\u201339"}, {"copy": "Use Adrenaline Rush with Blade Flurry for a planned hard target or double pull. Keep pickpocketing humanoids for gold, and save Vanish for the patrol or resist that changes the fight.", "level_label": "Levels 40\u201360", "level_max": 60, "level_min": 40, "title": "Levels 40\u201360"}], "milestone_ids": ["starting-map", "early-zone", "class-guide", "talent-route", "class-quests", "professions", "dungeon-jobs"], "name": "Rogue", "preparation_actions": [{"id": "class-guide", "route": "/classes/rogue/", "title": "Rogue class guide"}, {"id": "talent-route", "route": "/guides/rogue/talents/", "title": "Rogue talents and training"}, {"id": "class-quests", "route": "/classes/rogue/quests/", "title": "Rogue class quest unlocks"}, {"id": "professions", "route": "/classes/rogue/professions/", "title": "Professions for Rogue"}, {"id": "dungeon-jobs", "route": "/classes/rogue/dungeons/", "title": "Dungeon jobs for Rogue"}], "profession_route": "/classes/rogue/professions/", "race_keys": ["human", "dwarf", "night-elf", "gnome", "orc", "undead", "troll"], "recommended_races": {"dwarf": "Bleeds and poisons can break Stealth after Vanish and ruin the reset. A Dwarf can clear both with Stoneform before leaving the pull.", "human": "Combat spends most of the run using a sword, and Human keeps that weapon route stronger through the extra sword skill.", "orc": "A stun can consume the short window Rogue has to finish or leave a pull, and Hardiness improves the chance to resist it. Blood Fury adds damage and reduces incoming healing, so use it early in a controlled fight.", "troll": "Troll can use Berserking when health drops during a difficult fight, and the extra bow skill helps with occasional ranged pulls."}, "role": "Stealth melee with planned exits", "route": "/classes/rogue/", "spec": "Combat", "summary": "The safest route stays with controlled single-target fights and treats every weapon upgrade as part of the survival kit.", "talent_planner_path": "/assets/data/journey-talents/rogue.json?v=1.3.3", "talent_route": "/guides/rogue/talents/"}, {"class_quest_label": "Class quest unlocks", "class_quest_route": "/classes/shaman/quests/", "difficulty": "Many tools, limited mana", "dungeon_route": "/classes/shaman/dungeons/", "early_label": "Levels 1\u201311", "early_tip": "Orc and Troll begin in Durotar, while Tauren starts in Mulgore. Complete every totem quest when it appears, including Earth Totem at 4 and Fire Totem at 10. Fight single targets and learn how much mana each pull actually needs.", "early_title": "Totem quests first", "key": "shaman", "leveling_bands": [{"copy": "Orc and Troll begin in Durotar, while Tauren starts in Mulgore. Complete every totem quest when it appears, including Earth Totem at 4 and Fire Totem at 10. Fight single targets and learn how much mana each pull actually needs.", "level_label": "Levels 1\u201311", "level_max": 11, "level_min": 1, "title": "Totem quests first"}, {"copy": "Stonetalon and Ashenvale can carry the route toward Ghost Wolf at 20. Wailing Caverns fits the late teens, and Tremor Totem should be down before Mutanus can put the group to sleep.", "level_label": "Levels 12\u201323", "level_max": 23, "level_min": 12, "title": "Ghost Wolf at 20"}, {"copy": "Train Windfury Weapon at 30 and watch the mana bar through proc-heavy fights. Take Stormstrike at 40, with enough mana left for Healing Wave after using it. Razorfen Kraul and Scarlet Monastery Graveyard can provide useful upgrades along the way.", "level_label": "Levels 24\u201339", "level_max": 39, "level_min": 24, "title": "Windfury and Stormstrike"}, {"copy": "Tanaris, Western Plaguelands, and Eastern Plaguelands bring more caster packs, so decide on Earth Shock and the first totem before the pull begins. Reincarnation cannot revive a character on official Hardcore realms and should never be part of the escape plan.", "level_label": "Levels 40\u201360", "level_max": 60, "level_min": 40, "title": "Caster packs after 40"}], "milestone_ids": ["starting-map", "early-zone", "class-guide", "talent-route", "class-quests", "professions", "dungeon-jobs"], "name": "Shaman", "preparation_actions": [{"id": "class-guide", "route": "/classes/shaman/", "title": "Shaman class guide"}, {"id": "talent-route", "route": "/guides/shaman/talents/", "title": "Shaman talents and training"}, {"id": "class-quests", "route": "/classes/shaman/quests/", "title": "Shaman class quest unlocks"}, {"id": "professions", "route": "/classes/shaman/professions/", "title": "Professions for Shaman"}, {"id": "dungeon-jobs", "route": "/classes/shaman/dungeons/", "title": "Dungeon jobs for Shaman"}], "profession_route": "/classes/shaman/professions/", "race_keys": ["orc", "tauren", "troll"], "recommended_races": {"orc": "Enhancement spends most of the run in melee with an axe, so Orc fits the weapon route through Axe Specialization and adds another damage cooldown through Blood Fury.", "tauren": "When an add reaches melee, Tauren can use War Stomp to create two seconds for a heal or an exit. The extra health from Endurance supports the rest of the Enhancement route.", "troll": "Troll can use Berserking during a difficult melee fight when the next attack or Healing Wave needs to arrive quickly."}, "role": "Totem-supported melee with off-heals", "route": "/classes/shaman/", "spec": "Enhancement", "summary": "A normal pull needs one weapon, one useful totem, and a reserve for Healing Wave or Ghost Wolf.", "talent_planner_path": "/assets/data/journey-talents/shaman.json?v=1.3.3", "talent_route": "/guides/shaman/talents/"}, {"class_quest_label": "Class quest unlocks", "class_quest_route": "/classes/warlock/quests/", "difficulty": "Forgiving with practiced pet control", "dungeon_route": "/classes/warlock/dungeons/", "early_label": "Levels 1\u20139", "early_tip": "The Imp is your only pet through the opening levels, so use Shadow Bolt and Corruption on single targets and drink when the mana bar needs it. The Voidwalker arrives at 10 and takes responsibility for normal melee threat.", "early_title": "Before Voidwalker", "key": "warlock", "leveling_bands": [{"copy": "The Imp is your only pet through the opening levels, so use Shadow Bolt and Corruption on single targets and drink when the mana bar needs it. The Voidwalker arrives at 10 and takes responsibility for normal melee threat.", "level_label": "Levels 1\u20139", "level_max": 9, "level_min": 1, "title": "Before Voidwalker"}, {"copy": "Give the Voidwalker time to establish threat before applying DoTs. Train Drain Life at 14 and practice using it before the health bar reaches an emergency. Soulstone is learned at 18, though it cannot resurrect a character on official Hardcore realms.", "level_label": "Levels 10\u201323", "level_max": 23, "level_min": 10, "title": "Learn the Voidwalker"}, {"copy": "Train Banish at 28 before taking the Felhunter quest around 30. Spell Lock follows at 36, and Howl of Terror arrives at 40. Use either Fear spell only where fleeing targets cannot reach another pack.", "level_label": "Levels 24\u201339", "level_max": 39, "level_min": 24, "title": "Felhunter and Howl of Terror"}, {"copy": "After taking Soul Link at 40, the demon absorbs 30% of the damage dealt to you. Caster packs become more common after 50, so keep pulls to single targets in Eastern Plaguelands, Burning Steppes, and Winterspring whenever the terrain allows it.", "level_label": "Levels 40\u201360", "level_max": 60, "level_min": 40, "title": "Soul Link and caster packs"}], "milestone_ids": ["starting-map", "early-zone", "class-guide", "talent-route", "class-quests", "professions", "dungeon-jobs"], "name": "Warlock", "preparation_actions": [{"id": "class-guide", "route": "/classes/warlock/", "title": "Warlock class guide"}, {"id": "talent-route", "route": "/guides/warlock/talents/", "title": "Warlock talents and training"}, {"id": "class-quests", "route": "/classes/warlock/quests/", "title": "Warlock class quest unlocks"}, {"id": "professions", "route": "/classes/warlock/professions/", "title": "Professions for Warlock"}, {"id": "dungeon-jobs", "route": "/classes/warlock/dungeons/", "title": "Dungeon jobs for Warlock"}], "profession_route": "/classes/warlock/professions/", "race_keys": ["human", "gnome", "orc", "undead"], "recommended_races": {"gnome": "Getting rooted beside a damaged Voidwalker can close the only exit from a pull. Gnome can clear the root with Escape Artist, and Expansive Mind adds 5% Intellect throughout the run.", "human": "Human fits a steady drain route where the extra Spirit improves recovery between pulls.", "orc": "Orc strengthens the normal pet route through Command, which increases pet damage by 5%. Hardiness also improves the chance to resist the stun that would interrupt a cast or delay an exit.", "undead": "Fear can move the Warlock away from the pet and into another pack. Undead can break it with Will of the Forsaken, then use Cannibalize after a humanoid fight to recover without another spell."}, "role": "Pet-supported attrition caster", "route": "/classes/warlock/", "spec": "Demonology", "summary": "Normal pulls ask the Voidwalker to hold one target while DoTs and Drain Life keep health and mana under control.", "talent_planner_path": "/assets/data/journey-talents/warlock.json?v=1.3.3", "talent_route": "/guides/warlock/talents/"}, {"class_quest_label": "Class quest unlocks", "class_quest_route": "/classes/warrior/quests/", "difficulty": "Weapon-dependent early", "dungeon_route": "/classes/warrior/dungeons/", "early_label": "Levels 1\u201311", "early_tip": "Fight single targets and favor green quests while the early kit is small. Buy a meaningful weapon upgrade when the route stops providing one, since every extra second in melee costs health.", "early_title": "Weapon first", "key": "warrior", "leveling_bands": [{"copy": "Fight single targets and favor green quests while the early kit is small. Buy a meaningful weapon upgrade when the route stops providing one, since every extra second in melee costs health.", "level_label": "Levels 1\u201311", "level_max": 11, "level_min": 1, "title": "Weapon first"}, {"copy": "Use Overpower whenever a dodge opens it, and keep a bow or gun ready to separate targets before charging. A Deadmines run around 18 to 20 can provide a weapon upgrade. Bandage before starting the next fight.", "level_label": "Levels 12\u201323", "level_max": 23, "level_min": 12, "title": "Overpower and ranged pulls"}, {"copy": "Plan the Whirlwind Axe quest around level 30 and bring a Paladin or a group with healing for the difficult parts. Stay on yellow quests and treat the new weapon as room for safer pulls rather than permission to add another mob.", "level_label": "Levels 24\u201339", "level_max": 39, "level_min": 24, "title": "Whirlwind Axe"}, {"copy": "Mortal Strike and plate arrive at 40, improving both damage and durability. In dungeons, mark the controlled target before every pull and take useful weapon upgrades when they appear.", "level_label": "Levels 40\u201360", "level_max": 60, "level_min": 40, "title": "Mortal Strike and plate"}], "milestone_ids": ["starting-map", "early-zone", "class-guide", "talent-route", "class-quests", "professions", "dungeon-jobs"], "name": "Warrior", "preparation_actions": [{"id": "class-guide", "route": "/classes/warrior/", "title": "Warrior class guide"}, {"id": "talent-route", "route": "/guides/warrior/talents/", "title": "Warrior talents and training"}, {"id": "class-quests", "route": "/classes/warrior/quests/", "title": "Warrior class quest unlocks"}, {"id": "professions", "route": "/classes/warrior/professions/", "title": "Professions for Warrior"}, {"id": "dungeon-jobs", "route": "/classes/warrior/dungeons/", "title": "Dungeon jobs for Warrior"}], "profession_route": "/classes/warrior/professions/", "race_keys": ["human", "dwarf", "night-elf", "gnome", "orc", "undead", "tauren", "troll"], "recommended_races": {"gnome": "Roots and nets can close the retreat lane before Warrior reaches the next target. Gnome can clear them with Escape Artist and keep moving.", "human": "Human supports the two-handed route through extra sword and mace weapon skill, which applies from the first useful weapon onward.", "orc": "Choose Orc when the route already favors axes. Use Blood Fury early in a controlled fight, and remember that Hardiness improves the chance to resist a stun instead of guaranteeing it.", "troll": "Troll can use Berserking when a difficult pull needs to end quickly, and Regeneration continues during the recovery that follows."}, "role": "Frontline melee and dungeon tank", "route": "/classes/warrior/", "spec": "Arms", "summary": "Choose a slow two-hander with strong top-end damage and keep ordinary fights to one target. That leaves enough health to handle an add or begin the retreat early.", "talent_planner_path": "/assets/data/journey-talents/warrior.json?v=1.3.3", "talent_route": "/guides/warrior/talents/"}], "races": [{"asset_slug": "human", "class_keys": ["mage", "paladin", "priest", "rogue", "warlock", "warrior"], "faction": "Alliance", "key": "human", "name": "Human", "starting_area": "Northshire Valley", "starting_zone": {"faction_label": "Alliance", "height": 683, "image_path": "/assets/img/wow/route-maps/elwynn-forest-classic-map.jpg", "level_label": "Levels 1\u201310", "level_max": 10, "level_min": 1, "next_zones": [{"faction_label": "Alliance", "level_label": "Levels 10\u201320", "level_max": 20, "level_min": 10, "route": "/zones/westfall/", "summary": "Use Sentinel Hill as the reset point, clear each farm or Defias pocket as its own trip, and leave the coast and Moonbrook until the pull has a clean exit.", "title": "Westfall"}], "route": "/zones/elwynn-forest/", "summary": "Finish Northshire before Goldshire, treat each mine as its own trip, and bring a group for the Brackwell names and Hogger.", "title": "Elwynn Forest", "width": 1024}}, {"asset_slug": "dwarf", "class_keys": ["hunter", "paladin", "priest", "rogue", "warrior"], "faction": "Alliance", "key": "dwarf", "name": "Dwarf", "starting_area": "Coldridge Valley", "starting_zone": {"faction_label": "Alliance", "height": 668, "image_path": "/assets/img/wow/route-maps/dun-morogh-classic-map.jpg", "level_label": "Levels 1\u201310", "level_max": 10, "level_min": 1, "next_zones": [{"faction_label": "Alliance", "level_label": "Levels 10\u201320", "level_max": 20, "level_min": 10, "route": "/zones/loch-modan/", "summary": "Use Thelsamar as the reset point, split the trogg, mine, dam, and eastern-shore work into separate trips, and leave Mo\u0027grosh for a prepared group.", "title": "Loch Modan"}], "route": "/zones/dun-morogh/", "summary": "Leave Coldridge with the starter valley finished, treat the Frostmane caves as separate returns, and group before Vagash or Mangeclaw.", "title": "Dun Morogh", "width": 1022}}, {"asset_slug": "nightelf", "class_keys": ["druid", "hunter", "priest", "rogue", "warrior"], "faction": "Alliance", "key": "night-elf", "name": "Night Elf", "starting_area": "Shadowglen", "starting_zone": {"faction_label": "Alliance", "height": 683, "image_path": "/assets/img/wow/route-maps/teldrassil-classic-map.jpg", "level_label": "Levels 1\u201310", "level_max": 10, "level_min": 1, "next_zones": [{"faction_label": "Alliance", "level_label": "Levels 10\u201320", "level_max": 20, "level_min": 10, "route": "/zones/darkshore/", "summary": "Use Auberdine as the reset point, split the northern wreck, cave, and furbolg work into separate trips, and bring help for the southern events and escorts.", "title": "Darkshore"}], "route": "/zones/teldrassil/", "summary": "Leave Shadowglen with the spider cave finished or skipped, keep Fel Rock and Ban\u0027ethil separate, and clear Mist\u0027s return before accepting the timer.", "title": "Teldrassil", "width": 1024}}, {"asset_slug": "gnome", "class_keys": ["mage", "rogue", "warlock", "warrior"], "faction": "Alliance", "key": "gnome", "name": "Gnome", "starting_area": "Coldridge Valley", "starting_zone": {"faction_label": "Alliance", "height": 668, "image_path": "/assets/img/wow/route-maps/dun-morogh-classic-map.jpg", "level_label": "Levels 1\u201310", "level_max": 10, "level_min": 1, "next_zones": [{"faction_label": "Alliance", "level_label": "Levels 10\u201320", "level_max": 20, "level_min": 10, "route": "/zones/loch-modan/", "summary": "Use Thelsamar as the reset point, split the trogg, mine, dam, and eastern-shore work into separate trips, and leave Mo\u0027grosh for a prepared group.", "title": "Loch Modan"}], "route": "/zones/dun-morogh/", "summary": "Leave Coldridge with the starter valley finished, treat the Frostmane caves as separate returns, and group before Vagash or Mangeclaw.", "title": "Dun Morogh", "width": 1022}}, {"asset_slug": "orc", "class_keys": ["hunter", "rogue", "shaman", "warlock", "warrior"], "faction": "Horde", "key": "orc", "name": "Orc", "starting_area": "Valley of Trials", "starting_zone": {"faction_label": "Horde", "height": 683, "image_path": "/assets/img/wow/route-maps/durotar-classic-map.jpg", "level_label": "Levels 1\u201310", "level_max": 10, "level_min": 1, "next_zones": [{"faction_label": "Horde", "level_label": "Levels 10\u201325", "level_max": 25, "level_min": 10, "route": "/zones/barrens/", "summary": "Anchor at the Crossroads, split long chains into short loops, and leave Northwatch escorts for a prepared group.", "title": "The Barrens"}], "route": "/zones/durotar/", "summary": "Finish the Valley before Razor Hill, split the Echo Isles from Tiragarde Keep, and leave Dark Storms and Skull Rock for a prepared return.", "title": "Durotar", "width": 1024}}, {"asset_slug": "scourge", "class_keys": ["mage", "priest", "rogue", "warlock", "warrior"], "faction": "Horde", "key": "undead", "name": "Undead", "starting_area": "Deathknell", "starting_zone": {"faction_label": "Horde", "height": 668, "image_path": "/assets/img/wow/route-maps/tirisfal-glades-classic-map.jpg", "level_label": "Levels 1\u201310", "level_max": 10, "level_min": 1, "next_zones": [{"faction_label": "Horde", "level_label": "Levels 10\u201320", "level_max": 20, "level_min": 10, "route": "/zones/silverpine-forest/", "summary": "Use the Sepulcher as the reset point, finish the early north as short returns, and treat Ambermill, Pyrewood, and Fenris Isle as deliberate later trips.", "title": "Silverpine Forest"}], "route": "/zones/tirisfal-glades/", "summary": "Finish Deathknell before Brill, split the Scarlet towers from the Agamand Mills, and leave the Family Crypt for a prepared group.", "title": "Tirisfal Glades", "width": 1022}}, {"asset_slug": "tauren", "class_keys": ["druid", "hunter", "shaman", "warrior"], "faction": "Horde", "key": "tauren", "name": "Tauren", "starting_area": "Camp Narache", "starting_zone": {"faction_label": "Horde", "height": 683, "image_path": "/assets/img/wow/route-maps/mulgore-classic-map.jpg", "level_label": "Levels 1\u201310", "level_max": 10, "level_min": 1, "next_zones": [{"faction_label": "Horde", "level_label": "Levels 10\u201325", "level_max": 25, "level_min": 10, "route": "/zones/barrens/", "summary": "Anchor at the Crossroads, split long chains into short loops, and leave Northwatch escorts for a prepared group.", "title": "The Barrens"}], "route": "/zones/mulgore/", "summary": "Finish Red Cloud Mesa before Bloodhoof, keep the Palemane and Venture Co. caves optional, and bring help for Fizsprocket and Arra\u0027chea.", "title": "Mulgore", "width": 1024}}, {"asset_slug": "troll", "class_keys": ["hunter", "mage", "priest", "rogue", "shaman", "warrior"], "faction": "Horde", "key": "troll", "name": "Troll", "starting_area": "Valley of Trials", "starting_zone": {"faction_label": "Horde", "height": 683, "image_path": "/assets/img/wow/route-maps/durotar-classic-map.jpg", "level_label": "Levels 1\u201310", "level_max": 10, "level_min": 1, "next_zones": [{"faction_label": "Horde", "level_label": "Levels 10\u201325", "level_max": 25, "level_min": 10, "route": "/zones/barrens/", "summary": "Anchor at the Crossroads, split long chains into short loops, and leave Northwatch escorts for a prepared group.", "title": "The Barrens"}], "route": "/zones/durotar/", "summary": "Finish the Valley before Razor Hill, split the Echo Isles from Tiragarde Keep, and leave Dark Storms and Skull Rock for a prepared return.", "title": "Durotar", "width": 1024}}], "schema_version": 1, "zone_candidates": [{"faction_label": "Alliance", "factions": ["Alliance"], "id": "dun-morogh-zone-guide", "level_label": "Levels 1\u201310", "level_max": 10, "level_min": 1, "risk_tags": ["cave", "dense-camp", "patrol", "respawn", "runners", "travel"], "route": "/zones/dun-morogh/", "summary": "Leave Coldridge with the starter valley finished, treat the Frostmane caves as separate returns, and group before Vagash or Mangeclaw.", "title": "Dun Morogh"}, {"faction_label": "Horde", "factions": ["Horde"], "id": "durotar-zone-guide", "level_label": "Levels 1\u201310", "level_max": 10, "level_min": 1, "risk_tags": ["cave", "dense-camp", "respawn", "runners"], "route": "/zones/durotar/", "summary": "Finish the Valley before Razor Hill, split the Echo Isles from Tiragarde Keep, and leave Dark Storms and Skull Rock for a prepared return.", "title": "Durotar"}, {"faction_label": "Alliance", "factions": ["Alliance"], "id": "elwynn-forest-zone-guide", "level_label": "Levels 1\u201310", "level_max": 10, "level_min": 1, "risk_tags": ["cave", "dense-camp", "elite", "patrol", "respawn", "runners", "travel"], "route": "/zones/elwynn-forest/", "summary": "Finish Northshire before Goldshire, treat each mine as its own trip, and bring a group for the Brackwell names and Hogger.", "title": "Elwynn Forest"}, {"faction_label": "Horde", "factions": ["Horde"], "id": "mulgore-zone-guide", "level_label": "Levels 1\u201310", "level_max": 10, "level_min": 1, "risk_tags": ["cave", "dense-camp", "patrol", "respawn", "runners", "travel"], "route": "/zones/mulgore/", "summary": "Finish Red Cloud Mesa before Bloodhoof, keep the Palemane and Venture Co. caves optional, and bring help for Fizsprocket and Arra\u0027chea.", "title": "Mulgore"}, {"faction_label": "Alliance", "factions": ["Alliance"], "id": "teldrassil-zone-guide", "level_label": "Levels 1\u201310", "level_max": 10, "level_min": 1, "risk_tags": ["cave", "dense-camp", "escort", "event", "respawn", "runners", "travel"], "route": "/zones/teldrassil/", "summary": "Leave Shadowglen with the spider cave finished or skipped, keep Fel Rock and Ban\u0027ethil separate, and clear Mist\u0027s return before accepting the timer.", "title": "Teldrassil"}, {"faction_label": "Horde", "factions": ["Horde"], "id": "tirisfal-glades-zone-guide", "level_label": "Levels 1\u201310", "level_max": 10, "level_min": 1, "risk_tags": ["cave", "dense-camp", "respawn", "runners"], "route": "/zones/tirisfal-glades/", "summary": "Finish Deathknell before Brill, split the Scarlet towers from the Agamand Mills, and leave the Family Crypt for a prepared group.", "title": "Tirisfal Glades"}, {"faction_label": "Alliance", "factions": ["Alliance"], "id": "darkshore-zone-guide", "level_label": "Levels 10\u201320", "level_max": 20, "level_min": 10, "risk_tags": ["ambush", "cave", "dense-camp", "elite", "escort", "event", "respawn", "travel", "undead"], "route": "/zones/darkshore/", "summary": "Use Auberdine as the reset point, split the northern wreck, cave, and furbolg work into separate trips, and bring help for the southern events and escorts.", "title": "Darkshore"}, {"faction_label": "Alliance", "factions": ["Alliance"], "id": "loch-modan-zone-guide", "level_label": "Levels 10\u201320", "level_max": 20, "level_min": 10, "risk_tags": ["ambush", "cave", "dense-camp", "elite", "escort", "event", "patrol", "respawn", "runners", "travel"], "route": "/zones/loch-modan/", "summary": "Use Thelsamar as the reset point, split the trogg, mine, dam, and eastern-shore work into separate trips, and leave Mo\u0027grosh for a prepared group.", "title": "Loch Modan"}, {"faction_label": "Horde", "factions": ["Horde"], "id": "silverpine-forest-zone-guide", "level_label": "Levels 10\u201320", "level_max": 20, "level_min": 10, "risk_tags": ["cave", "dense-camp", "elite", "escort", "event", "patrol", "respawn", "travel", "undead"], "route": "/zones/silverpine-forest/", "summary": "Use the Sepulcher as the reset point, finish the early north as short returns, and treat Ambermill, Pyrewood, and Fenris Isle as deliberate later trips.", "title": "Silverpine Forest"}, {"faction_label": "Alliance", "factions": ["Alliance"], "id": "westfall-zone-guide", "level_label": "Levels 10\u201320", "level_max": 20, "level_min": 10, "risk_tags": ["dense-camp", "escort", "patrol", "respawn", "runners", "travel"], "route": "/zones/westfall/", "summary": "Use Sentinel Hill as the reset point, clear each farm or Defias pocket as its own trip, and leave the coast and Moonbrook until the pull has a clean exit.", "title": "Westfall"}, {"faction_label": "Horde", "factions": ["Horde"], "id": "barrens-zone-guide", "level_label": "Levels 10\u201325", "level_max": 25, "level_min": 10, "risk_tags": ["ambush", "dense-camp", "elite", "escort", "event", "patrol", "respawn", "travel"], "route": "/zones/barrens/", "summary": "Anchor at the Crossroads, split long chains into short loops, and leave Northwatch escorts for a prepared group.", "title": "The Barrens"}, {"faction_label": "Alliance", "factions": ["Alliance"], "id": "redridge-mountains-zone-guide", "level_label": "Levels 15\u201325", "level_max": 25, "level_min": 15, "risk_tags": ["cave", "dense-camp", "elite", "escort", "patrol", "respawn", "travel"], "route": "/zones/redridge-mountains/", "summary": "Use Lakeshire as the reset point, finish the lake and outer camps as separate trips, and leave the northern cave and Stonewatch layer for a prepared group.", "title": "Redridge Mountains"}, {"faction_label": "Alliance and Horde", "factions": ["Alliance", "Horde"], "id": "stonetalon-mountains-zone-guide", "level_label": "Levels 15\u201325", "level_max": 25, "level_min": 15, "risk_tags": ["cave", "dense-camp", "elite", "escort", "event", "patrol", "respawn", "runners", "travel"], "route": "/zones/stonetalon-mountains/", "summary": "Keep the shared, Horde, and Alliance trips separate, use the main road as the reset, skip the mine defense, and leave elite spiders and cave summons for a prepared group or later pass.", "title": "Stonetalon Mountains"}, {"faction_label": "Alliance and Horde", "factions": ["Alliance", "Horde"], "id": "ashenvale-zone-guide", "level_label": "Levels 18\u201330", "level_max": 30, "level_min": 18, "risk_tags": ["ambush", "cave", "dense-camp", "elite", "escort", "event", "patrol", "respawn", "travel"], "route": "/zones/ashenvale/", "summary": "Keep the Alliance and Horde trips separate, use Astranaar or Splintertree Post as the reset, and bring a group for the Horde escort and banner events.", "title": "Ashenvale"}, {"faction_label": "Alliance", "factions": ["Alliance"], "id": "duskwood-zone-guide", "level_label": "Levels 20\u201330", "level_max": 30, "level_min": 20, "risk_tags": ["cave", "dense-camp", "elite", "patrol", "respawn", "runners", "travel", "undead"], "route": "/zones/duskwood/", "summary": "Quest from Darkshire outward, check the road for Stitches, and pull Worgen caves back toward the entrance.", "title": "Duskwood"}, {"faction_label": "Alliance and Horde", "factions": ["Alliance", "Horde"], "id": "desolace-zone-guide", "level_label": "Levels 30\u201340", "level_max": 40, "level_min": 30, "risk_tags": ["ambush", "dense-camp", "elite", "escort", "event", "patrol", "respawn", "runners", "travel", "undead"], "route": "/zones/desolace/", "summary": "Desolace has long runs between scattered camps, so a broken pull can leave the character far from help or a quick reset.", "title": "Desolace"}, {"faction_label": "Alliance and Horde", "factions": ["Alliance", "Horde"], "id": "stranglethorn-vale-zone-guide", "level_label": "Levels 30\u201345", "level_max": 45, "level_min": 30, "risk_tags": ["ambush", "cave", "dense-camp", "elite", "event", "patrol", "respawn", "travel", "undead"], "route": "/zones/stranglethorn-vale/", "summary": "Open in the north, move south after 37, and return north for the 40-plus finales. Dense camps, stealth panthers, and troll healers make the long chain unsafe to rush.", "title": "Stranglethorn Vale"}, {"faction_label": "Alliance and Horde", "factions": ["Alliance", "Horde"], "id": "tanaris-zone-guide", "level_label": "Levels 40\u201350", "level_max": 50, "level_min": 40, "risk_tags": ["ambush", "cave", "dense-camp", "escort", "patrol", "respawn", "runners", "travel"], "route": "/zones/tanaris/", "summary": "Use open terrain for Wastewander and pirate camps. Roots, respawns, and Silithid tunnels remove the exit from a pull.", "title": "Tanaris"}, {"faction_label": "Alliance and Horde", "factions": ["Alliance", "Horde"], "id": "felwood-zone-guide", "level_label": "Levels 48\u201355", "level_max": 55, "level_min": 48, "risk_tags": ["ambush", "cave", "dense-camp", "escort", "patrol", "respawn", "runners", "travel"], "route": "/zones/felwood/", "summary": "Use the main road as the spine and enter Jaedenar, Shadow Hold, and the Jadefire ground on purpose. Corrupted ancients read as scenery until they move.", "title": "Felwood"}, {"faction_label": "Alliance and Horde", "factions": ["Alliance", "Horde"], "id": "ungoro-crater-zone-guide", "level_label": "Levels 48\u201355", "level_max": 55, "level_min": 48, "risk_tags": ["ambush", "cave", "dense-camp", "elite", "escort", "patrol", "respawn", "travel"], "route": "/zones/ungoro-crater/", "summary": "Marshal\u0027s Refuge is the only reset in the crater. Devilsaurs walk the open floor, so the danger here is the ground between objectives rather than the objectives themselves.", "title": "Un\u0027Goro Crater"}, {"faction_label": "Alliance and Horde", "factions": ["Alliance", "Horde"], "id": "burning-steppes-zone-guide", "level_label": "Levels 50\u201358", "level_max": 58, "level_min": 50, "risk_tags": ["ambush", "cave", "dense-camp", "elite", "patrol", "respawn", "runners", "travel"], "route": "/zones/burning-steppes/", "summary": "Morgan\u0027s Vigil and Flame Crest are the only resets. Everything north and east of the road is Blackrock orc, Firegut ogre, or black dragonflight ground.", "title": "Burning Steppes"}, {"faction_label": "Alliance and Horde", "factions": ["Alliance", "Horde"], "id": "western-plaguelands-zone-guide", "level_label": "Levels 51\u201358", "level_max": 58, "level_min": 51, "risk_tags": ["ambush", "dense-camp", "elite", "escort", "event", "patrol", "respawn", "travel", "undead"], "route": "/zones/western-plaguelands/", "summary": "Work the cauldron chain west to east and keep Chillwind Camp or the Bulwark as the reset. Andorhal refills faster than one quest loop takes.", "title": "Western Plaguelands"}, {"faction_label": "Alliance and Horde", "factions": ["Alliance", "Horde"], "id": "winterspring-zone-guide", "level_label": "Levels 55\u201360", "level_max": 60, "level_min": 55, "risk_tags": ["ambush", "cave", "dense-camp", "elite", "escort", "event", "patrol", "respawn", "runners", "travel", "undead"], "route": "/zones/winterspring/", "summary": "Everlook is the only real reset. Work the Winterfall ground south of it and treat Mazthoril, the Frostmaul flats, and Darkwhisper Gorge as places the route stops.", "title": "Winterspring"}]}Use this full list when you want to compare zones without building a character route first.
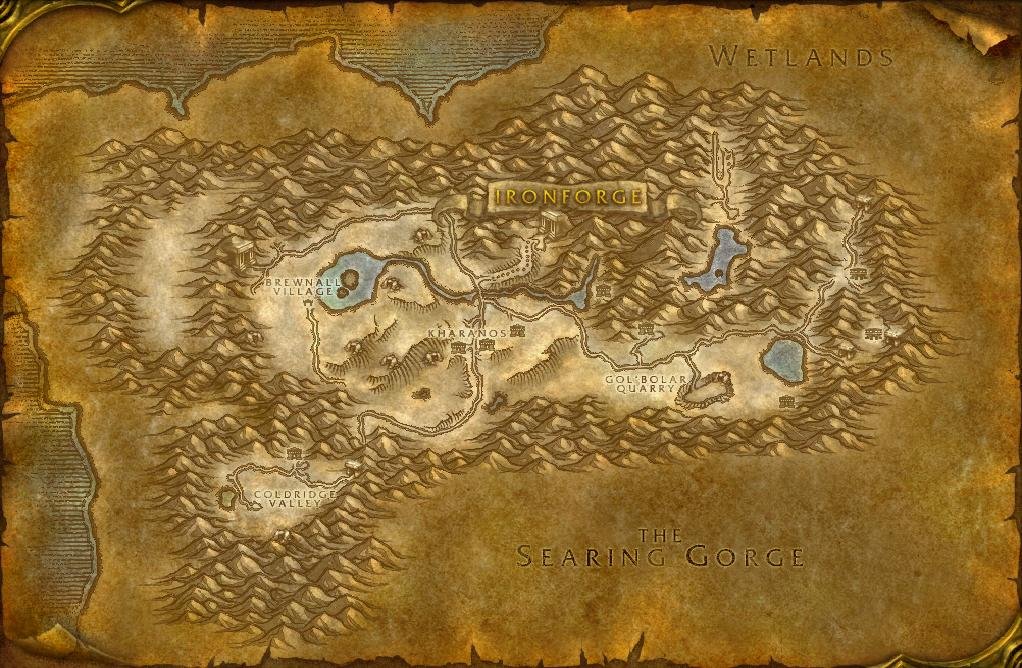
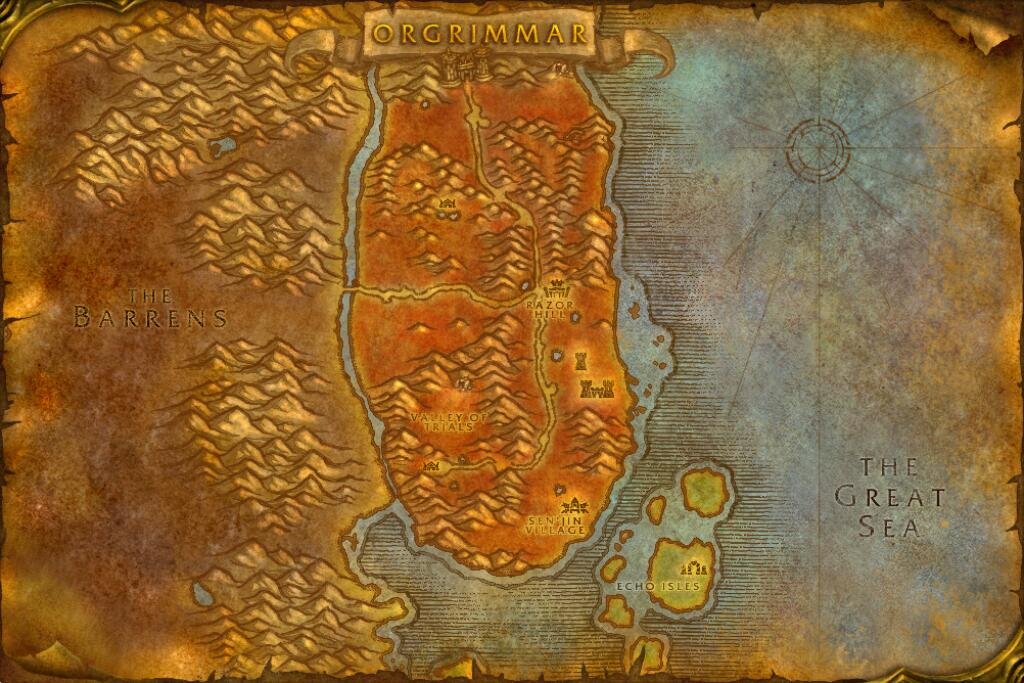
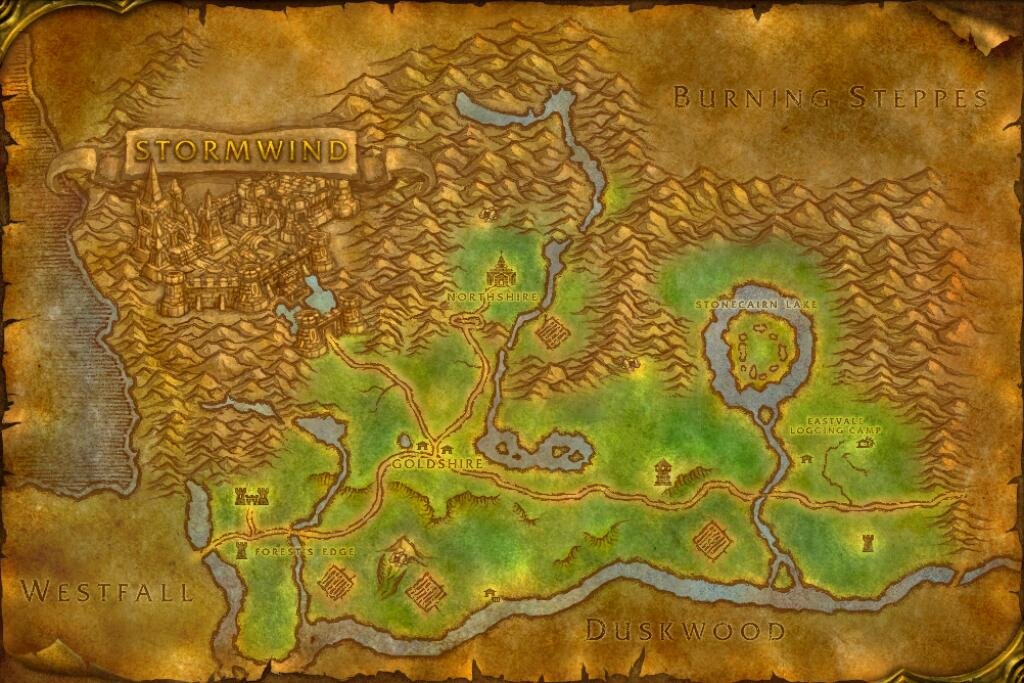
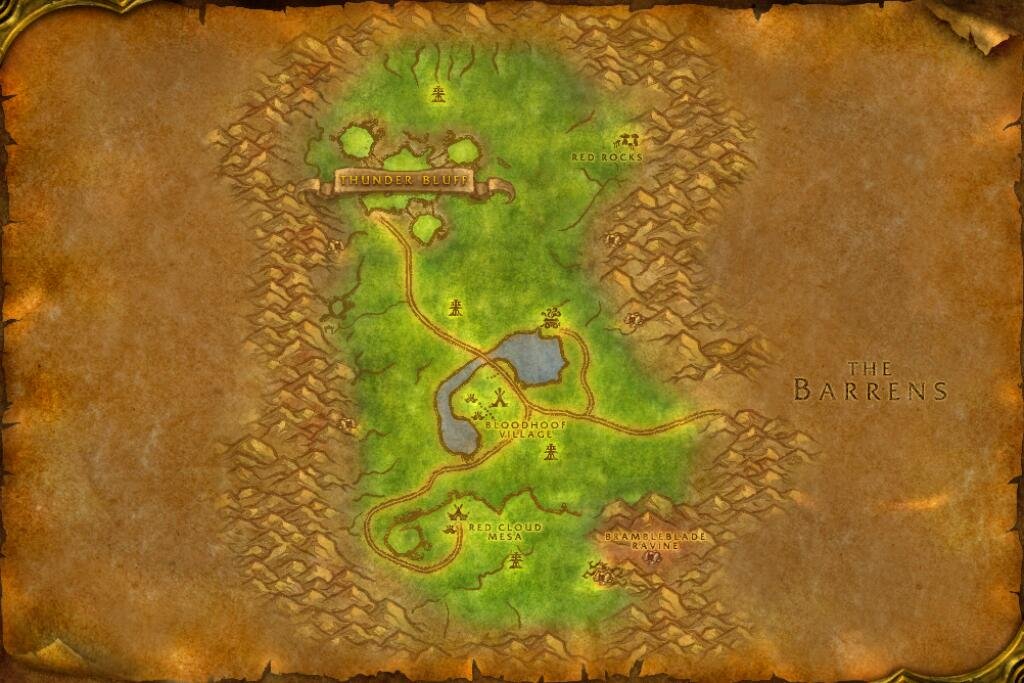
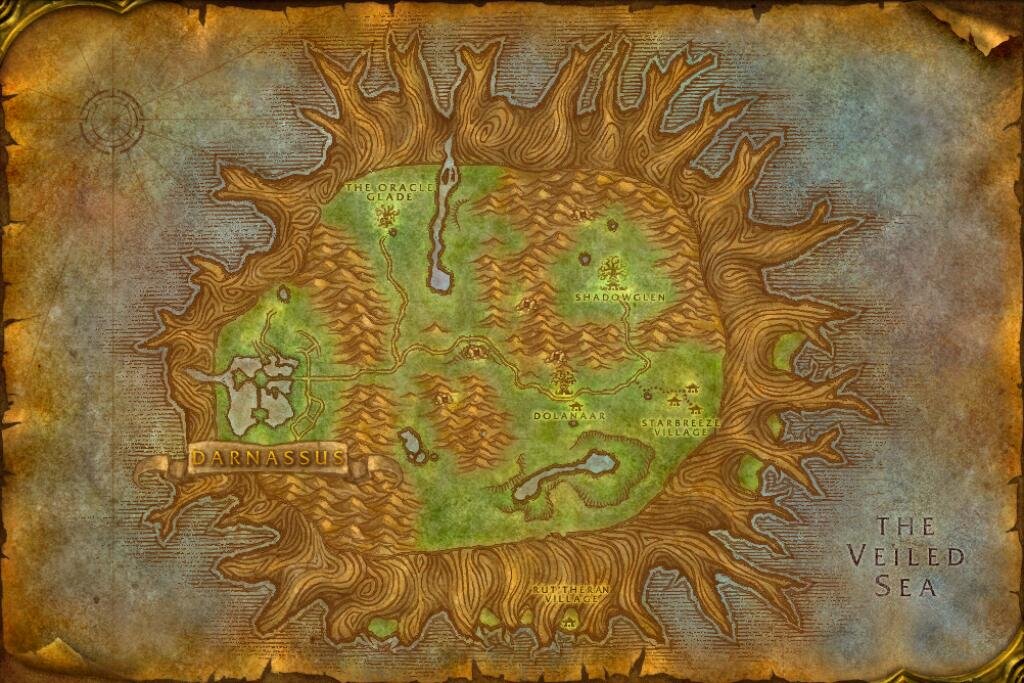
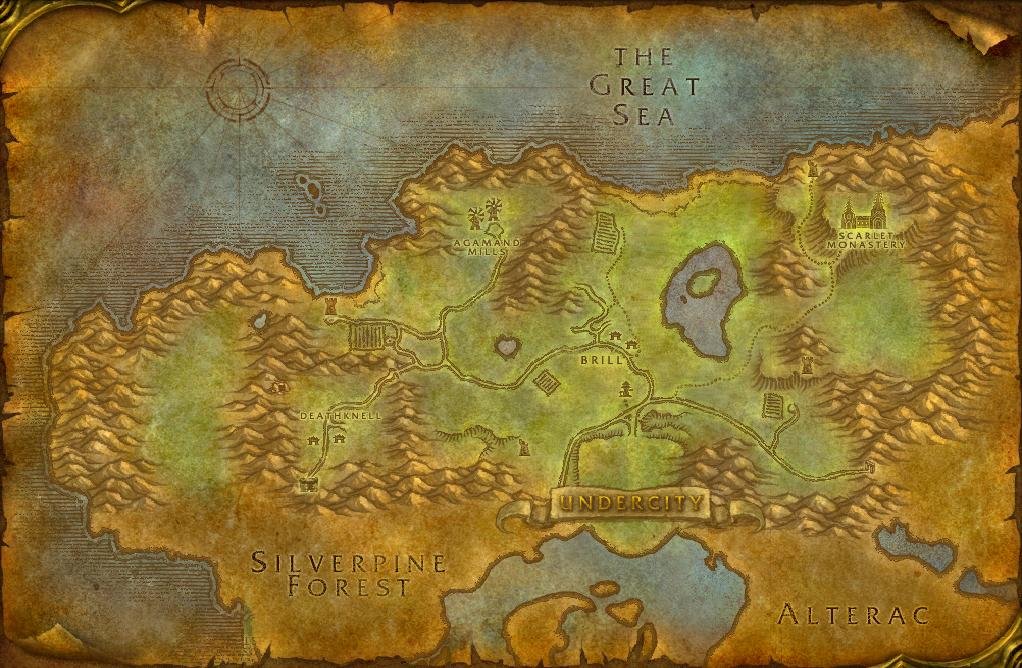
The character builder narrows this list to the destination named by the selected starting map.
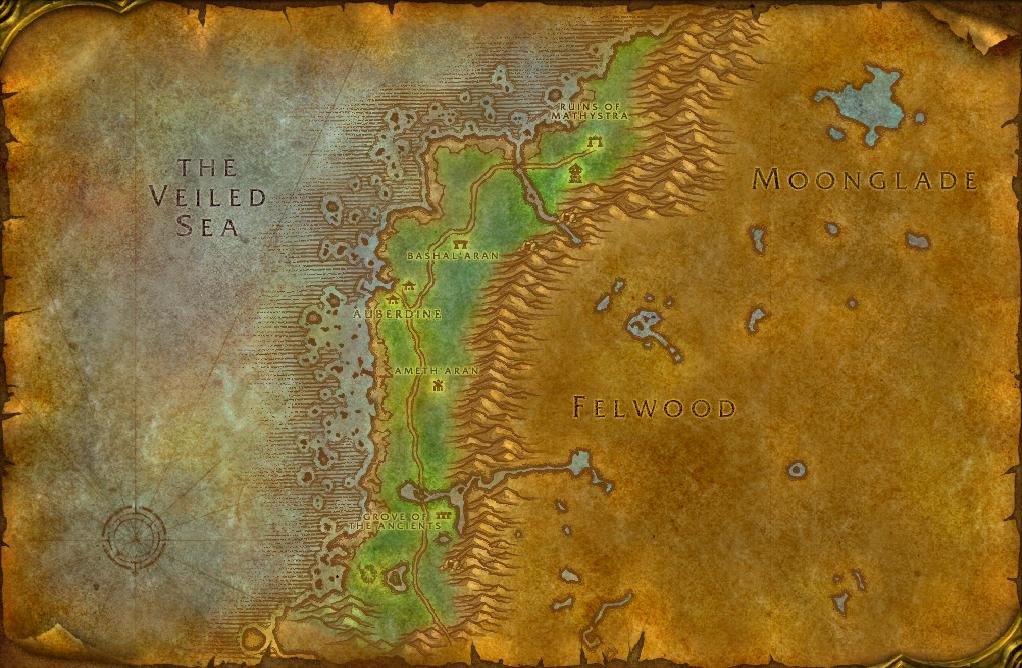
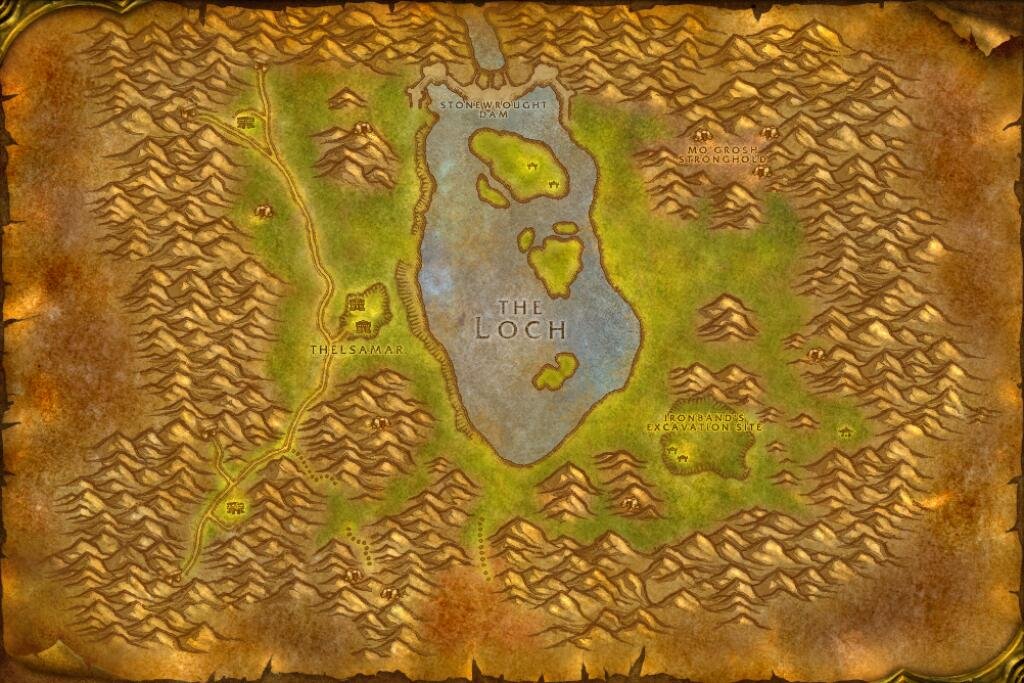
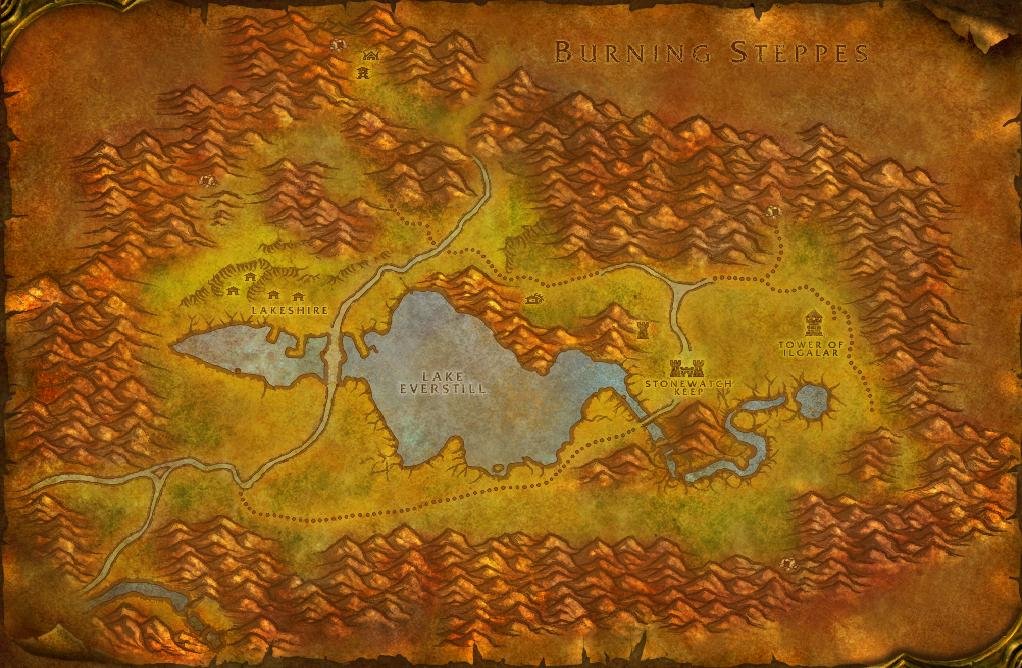
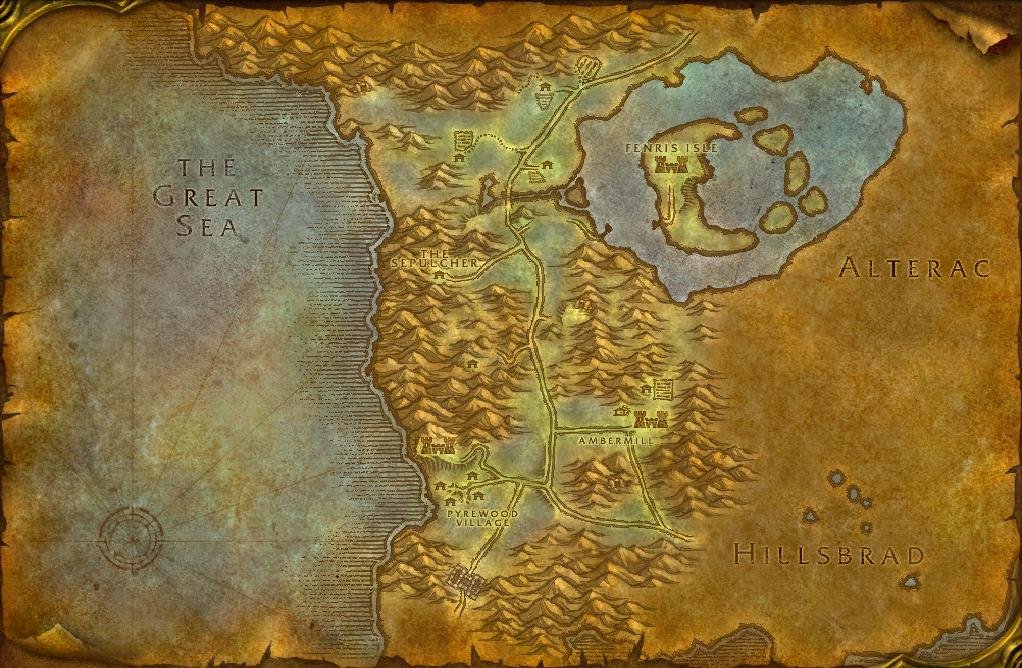
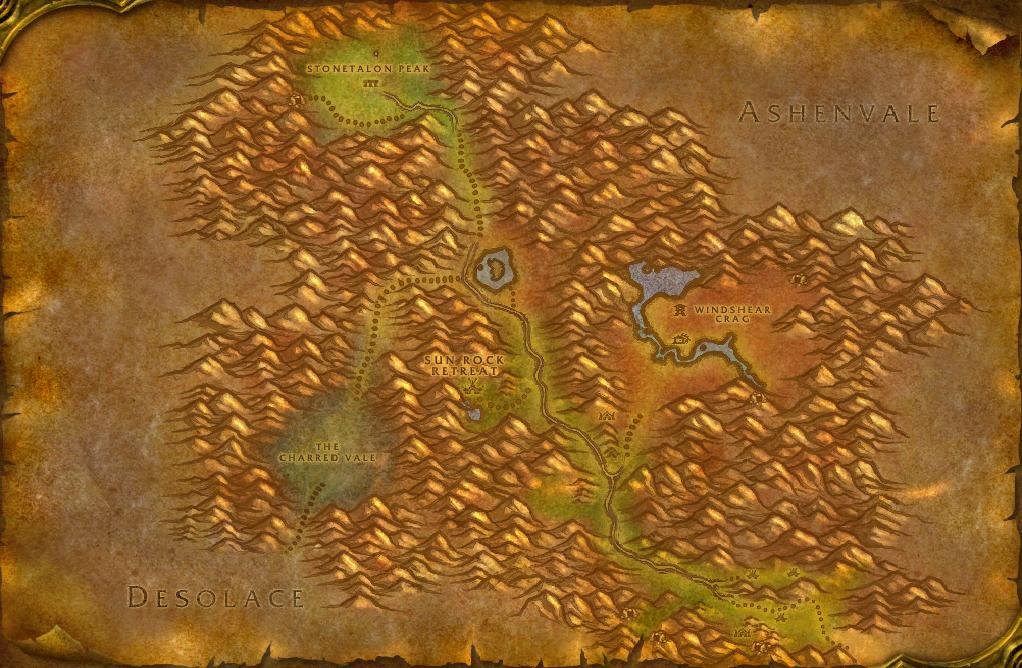
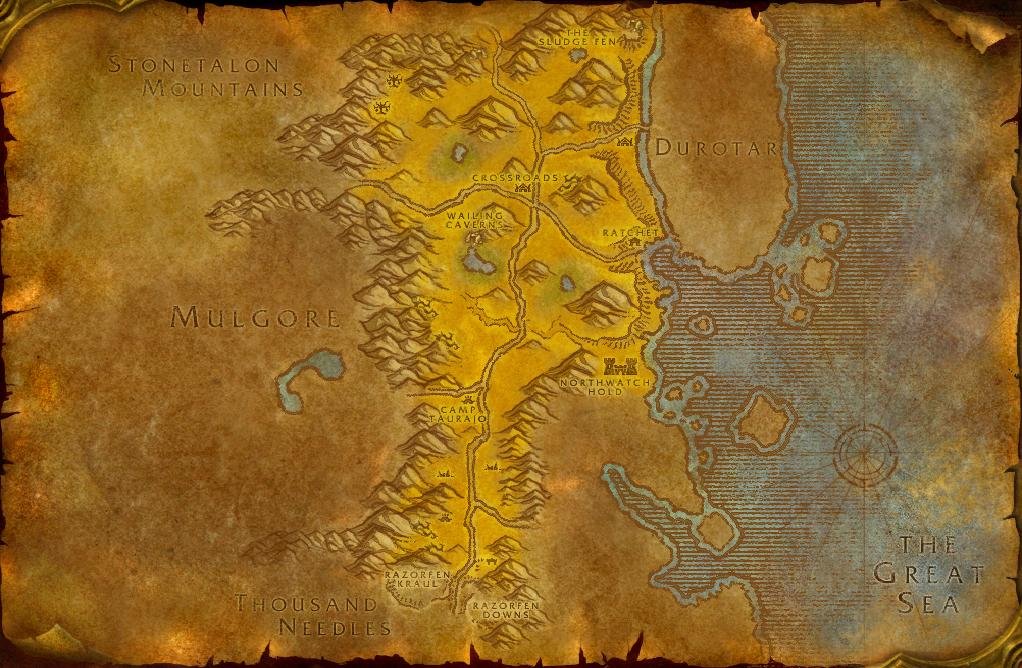
Keep every lesson available. A selected character highlights the lessons that match its level and current map risks.
Eat, bandage, clear bags, read the terrain, and leave after a warning. These habits keep the route controlled.
Open lessonCaves, ships, towers, mines, and lifts restrict the exit and turn a simple fight into a route problem.
Open lessonCarry healing, escape, and protection consumables before a route needs them.
Open lessonA good group agrees on a reset call, pull pace, and patrol information before an invite changes the layer.
Open lessonWhen a pull widens, create space, use the tool that buys it, and take the exit.
Open lessonAuto-run, lifts, docks, weak bags, and unsafe AFKs can end a run without a hostile nameplate.
Open lessonEvery Classic class has an unlock atlas with prerequisites, travel risks, failure states, and safe exits.
Start with the Bear Form chain, keep the faction route explicit, and clear the summon area before spending the dust.
Level 10 pet trainingComplete the three local practice tames, finish the capital-city training, and never begin a tame channel with a second body in the lane.
Level 38+ group routeTreat Mage's Wand as a grouped level-38 route: clear Scarlet Monastery Library, finish the parallel reagent branch, and keep Frost Nova and Blink for the exit.
Level 24+ group routeRoute Verigan's Fist as grouped dungeon and elite-area work. Leave the Daphne defense or reset a component pull when it spends a major cooldown early.
Level 10 racial riteFinish the level-10 racial rite before leaving the trainer route. Human and Dwarf Priests share Desperate Prayer. The other races receive their own spell.
Level 20 poison routeRaise Lockpicking before the poison chain, delay the tower until the class has a fuller escape kit, and leave when the scripted route stops behaving.
Level 10 Fire TotemTake the walking path to Telf Joolam, farm the reagent camps from their open edges, and reach full health before using Fire Sapta.
Level 10 VoidwalkerUnlock the Voidwalker at 10, but match the safety call to the route: Undercity is direct, Brackwell needs help, and Skull Rock waits for a group.
Level 30 stance, near 40 weaponUnlock Berserker Stance at 30, then return near 40 with a level-appropriate group for Cyclonian and the Whirlwind weapon. Never start either event without the exit plan ready.
Compare recovery, control, crafted upgrades, and the material burden the character can carry.
Collect prerequisites and pickups, budget bag space, and know the abandon call before entering.
A low-level Alliance dungeon with runners, corners, stair pulls, and a ship that needs a reset before boarding.
Quest-run prep boardSet the cave route and stop runners before they find a side path. The escort is optional.