Zones

Stranglethorn Vale

Open in the north, move south after 37, and return north for the 40-plus finales. Dense camps, stealth panthers, and troll healers make the long chain unsafe to rush.

Buff My Pet Editorial
Classic Hardcore · safety route

Quest safety dossier

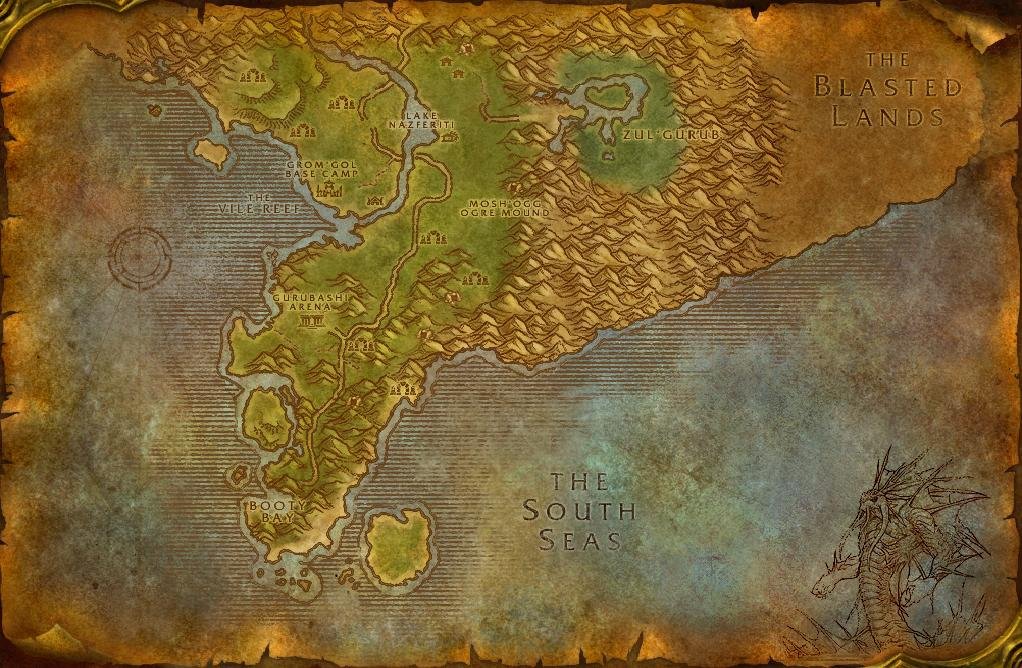
The annotated Classic map shows approximate quest-risk locations, broad hazard areas, and safe anchors. Callouts show our conservative verdict, safety level, and first risk. The lists carry the full failure state and exit call.

Swipe or scroll sideways to inspect the full map.

Map guidance

The Classic zone map is decorative. Numbered markers match the checkpoint cards below. Hazard highlights show approximate risk corridors or areas, never exact spawn points or patrol paths; the visible zone-wide hazard list following the figure carries the equivalent warning details.

Map anchors
  • Rebel Camp (safe hub)
  • Kurzen Stockpile (cave)
  • Zul'Kunda (danger area)
  • Nesingwary Camp (camp)
  • Lake Nazferiti (danger area)
  • Grom'gol (safe hub)
  • Bangalash Hill (danger area)
  • Crystalvein Mine (cave)
  • Southern Ruins (danger area)
  • Gorilla Cave (cave)
  • Booty Bay (safe hub)
  • Bloodsail Coast (coast)
  • Jaguero Isle (coast)

Annotated Classic zone map. Quest callouts give a short checkpoint label, verdict, safety level, and first listed risk; +N means the card lists more risks. Hazard highlights mark approximate risk corridors or areas, not exact spawn points or patrol paths. Connection relationships are not drawn as navigation lines. Use Rebel Camp or Grom'gol as the northern reset, then make Booty Bay the southern anchor. Keep caves, ruins, and coastlines on separate branches. Confirm exact navigation in game. Numbered markers match the ordered checklist below.

  • Do now
  • Return later
  • Bring a group
  • Skip
Persistent threats

Zone-wide hazards

Map highlights are approximate risk areas or corridors. Use these static warnings for the complete call and confirm the threat in game.

  • Warning

    37–38 · Both

    Shadowmaw Panthers

    Map label: Shadowmaw ambush

    Risk
    Ambush
    Area
    Brush belts east of Grom'gol and north of Gurubashi Arena
    Failure state
    A stealthed Shadowmaw Panther opens on you while another jungle mob is engaged.
    Exit call
    Cross the brush slowly. On the first extra, retreat through the last cleared lane toward Grom'gol or the road.
    Back to map
  1. Checkpoint 1

    36+ · Both

    Hostile Takeover

    Do now
    Risk
    PatrolDense camp
    Map position
    Near Lake Nazferiti · marker 1 at approximately 45% from the left and 18% from the top
    Failure state
    A geologist or shredder patrol closes the cleared coast lane.
    Exit call
    Leave from the outside ring before the lane closes.
    Back to map
  2. Checkpoint 2

    37+ · Both

    Tiger Mastery

    Do now
    Risk
    Patrol
    Map position
    Near Nesingwary Camp · marker 2 at approximately 32% from the left and 17% from the top
    Failure state
    Sin'Dall's Knock Down lets a nearby tiger enter the fight.
    Exit call
    Leave toward Nesingwary.
    Back to map
  3. Checkpoint 3

    40+ · Alliance

    Colonel Kurzen

    Skip
    Risk
    CaveEliteDense camp
    Map position
    Near Kurzen Stockpile · marker 3 at approximately 50% from the left and 4% from the top
    Failure state
    The retreat lane back to the Stockpile mouth starts to close.
    Exit call
    Stop and leave through the cave mouth.
    Back to map
  4. Checkpoint 4

    41+ · Horde

    Bloodscalp Clan Heads

    Bring a group
    Risk
    Dense campRespawn
    Map position
    Near Zul'Kunda · marker 4 at approximately 23% from the left and 8% from the top
    Failure state
    A chief's bodyguards join or the cleared courtyard refills.
    Exit call
    Stop and take the cleared lane out of Zul'Kunda.
    Back to map
  5. Checkpoint 5

    45+ · Horde

    The Singing Crystals

    Return later
    Risk
    Cave
    Map position
    Near Crystalvein Mine · marker 5 at approximately 43% from the left and 49% from the top
    Failure state
    Another Ironjaw commits after the mouth-side lane is no longer clear.
    Exit call
    Leave through the mine mouth with the quest unfinished.
    Back to map
  6. Checkpoint 6

    43+ · Both

    Big Game Hunter

    Bring a group
    Risk
    AmbushEliteDense camp
    Map position
    Near Bangalash Hill · marker 6 at approximately 38% from the left and 36% from the top
    Failure state
    The two panther adds join while another cat remains on the hill.
    Exit call
    Leave the hill instead of resetting into new cats.
    Back to map
  7. Checkpoint 7

    44+ · Both

    Voodoo Dues

    Bring a group
    Quest
    Voodoo Dues
    Risk
    TravelDense campUndead
    Map position
    Near Southern Ruins · marker 7 at approximately 35% from the left and 51% from the top
    Failure state
    Two targets at Jubuwal and one at Aboraz turn one marker into a multi-ruin route.
    Exit call
    Bring a group and return to the road between the two ruins.
    Back to map
  8. Checkpoint 8

    51+ · Both

    Stranglethorn Fever

    Bring a group
    Risk
    EventCave
    Map position
    Near Gorilla Cave · marker 8 at approximately 35% from the left and 60% from the top
    Failure state
    Unbagwa dies before Mokk is summoned, consuming the attempt and another 10 Gorilla Fangs.
    Exit call
    Return at 51+ with a group and reset outside the mouth before starting.
    Back to map
  9. Checkpoint 9

    45+ · Both

    The Bloodsail Buccaneers finale

    Skip
    Risk
    Dense campRespawnTravel
    Map position
    Near Bloodsail Coast · marker 9 at approximately 33% from the left and 88% from the top
    Failure state
    Three separate ships expose the route to heavy casters, linked deck pulls, and respawns.
    Exit call
    Do not board during this route. Return very overleveled with a group.
    Back to map
  10. Checkpoint 10

    51+ · Both

    Message in a Bottle: King Mukla

    Return later
    Risk
    TravelEliteAmbush
    Map position
    Near Jaguero Isle · marker 10 at approximately 41% from the left and 84% from the top
    Failure state
    A stealthed Jaguero Stalker joins the King Mukla fight away from a road.
    Exit call
    Return at 51+ with a partner after clearing the island approach.
    Back to map
Before this route

Prepare the failure states

Read the lessons that match this map's terrain, group pressure, travel, and reset risks.

Levels 30-45

Open in the north through 37, then move south for the next band. Return north for the 40-plus finales as a separate prepared route.

Density reduces your margin

  • Mob density: targets live close together. One mob can bring a second.

  • Trolls: healers, casters, and melee share the camp. Kill the healer first.

  • Panthers: stealthed cats can join an active fight from nearby brush.

  • Nesingwary chain: each step sends the hunt deeper. Stop when the next target is no longer green and return after another level band.

Keep the route short

  • Start around Rebel Camp. Move south after the early northern mobs turn green, then plan a separate northern return for the later finales.

  • Hearth out after the route is done instead of crossing the zone again.

  • Avoid the coast when possible. Murlocs and pirates have dense camps and fast joins.

The average pull can end the session

STV can reduce the margin through dense camps and repeated small pulls. Reset before an ordinary pull becomes a larger one.
Related articles
Last updated