Zones

Tirisfal Glades

Finish Deathknell before Brill, split the Scarlet towers from the Agamand Mills, and leave the Family Crypt for a prepared group.

Buff My Pet Editorial
Classic Hardcore · safety route

Quest safety dossier

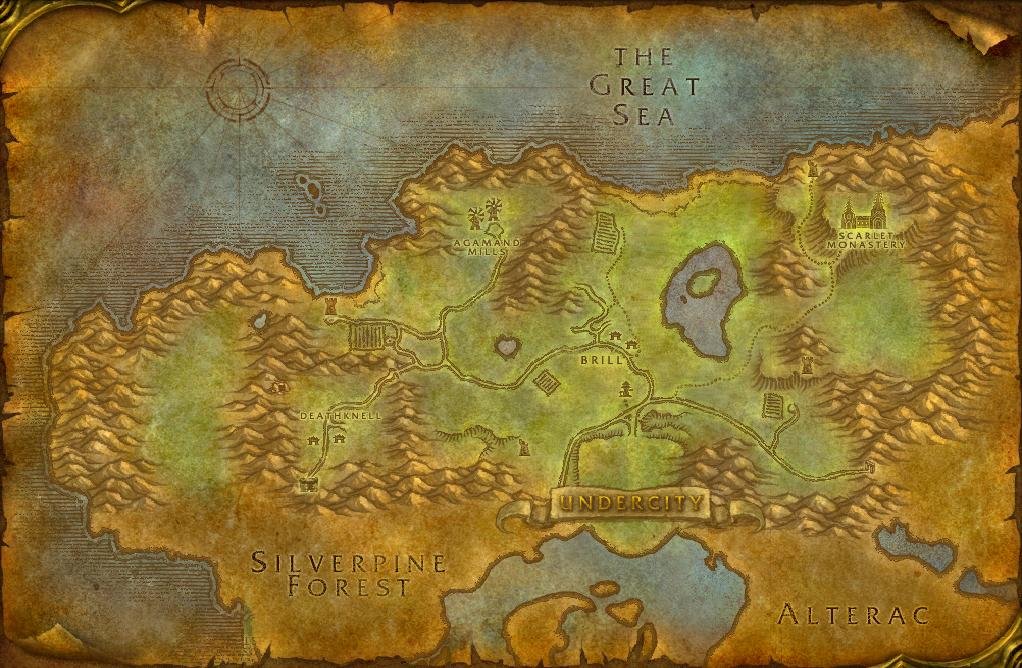
The annotated Classic map shows approximate quest-risk locations and safe anchors. Callouts show our conservative verdict, safety level, and first risk. The checklist carries the full failure state and exit call.

Swipe or scroll sideways to inspect the full map.

Map guidance

The Classic zone map is decorative. Numbered markers match the cards below; every card names its explicitly reviewed map anchor and approximate relative position.

Map anchors
  • Deathknell (safe hub)
  • Solliden tower (danger area)
  • Agamand Mills (danger area)
  • Brill (safe hub)
  • Mass Graves (danger area)
  • Garren's Haunt (danger area)
  • Crusader Outpost (danger area)
  • Undercity (safe hub)
  • Silverpine road (road gate)

Annotated Classic zone map. Quest callouts give a short checkpoint label, verdict, safety level, and first listed risk; +N means the card lists more risks. Marker positions identify approximate quest-risk areas, not exact spawn points. Connection relationships are not drawn as navigation lines. Finish Deathknell before Brill. Treat the western Scarlet tower, Agamand Mills, Garren's Haunt, the eastern Scarlet outposts, and the Family Crypt as separate trips. Checkpoint markers are approximate risk areas, not exact spawns or safe paths. Confirm exact navigation in game. Numbered markers match the ordered checklist below.

  • Do now
  • Return later
  • Bring a group
  • Skip
  1. Checkpoint 1

    5+ · Horde

    Night Web's Hollow

    Return later
    Risk
    CaveRespawn
    Map position
    Near Deathknell · marker 1 at approximately 27% from the left and 58% from the top
    Failure state
    A Night Web spider respawns behind you while the remaining kills pull you farther into the mine.
    Exit call
    Return at 5+, work from the mouth inward, and turn out on the first spider behind your cleared line.
    Back to map
  2. Checkpoint 2

    6+ · Horde

    The Red Messenger

    Do now
    Risk
    Dense campRespawn
    Map position
    Near Deathknell · marker 2 at approximately 39% from the left and 63% from the top
    Failure state
    Meven Korgal holds the fight while a nearby crusader or camp respawn joins before the documents drop.
    Exit call
    Clear the messenger pocket first, fight toward Deathknell, and reset immediately if another crusader joins.
    Back to map
  3. Checkpoint 3

    8+ · Horde

    At War: Scarlet Warriors

    Return later
    Risk
    Dense campRunners
    Map position
    Near Solliden tower · marker 3 at approximately 40% from the left and 45% from the top
    Failure state
    A fleeing Scarlet Warrior reaches the next tower pack while the road-side reset closes behind you.
    Exit call
    Return at 8+, pull from the road edge, and do not follow a runner around the ruined tower.
    Back to map
  4. Checkpoint 4

    11+ · Horde

    Agamand Mills circuit

    Return later
    Risk
    Dense campRespawn
    Map position
    Near Agamand Mills · marker 4 at approximately 43% from the left and 38% from the top
    Failure state
    A named Agamand or bonecaster extends the fight while outdoor undead refill the long route back to the road.
    Exit call
    Return at 11+, finish outdoor objectives from the road inward, and leave before entering the family crypt.
    Back to map
  5. Checkpoint 5

    9+ · Horde

    Graverobbers

    Do now
    Quest
    Graverobbers
    Risk
    Dense campRunners
    Map position
    Near Mass Graves · marker 5 at approximately 50% from the left and 48% from the top
    Failure state
    A Rot Hide runs into another grave pocket while the required ichor keeps you farming after the kill counts finish.
    Exit call
    Work the southwest edge, stop following runners downhill, and reset to the road when the cleared pocket refills.
    Back to map
  6. Checkpoint 6

    10+ · Horde

    Wanted: Maggot Eye

    Bring a group
    Risk
    Dense campRespawn
    Map position
    Near Garren's Haunt · marker 6 at approximately 59% from the left and 31% from the top
    Failure state
    Maggot Eye survives the opening control while another Rot Hide closes the path out of Garren's Haunt.
    Exit call
    Bring a group, clear the named pocket from the outside, and abandon the pull as soon as an extra joins.
    Back to map
  7. Checkpoint 7

    12+ · Horde

    At War: Captain Vachon

    Bring a group
    Risk
    Dense campRespawn
    Map position
    Near Crusader Outpost · marker 7 at approximately 84% from the left and 61% from the top
    Failure state
    Captain Vachon holds the fight while a Scarlet Friar, Zealot, or tower respawn joins.
    Exit call
    Bring a group, clear the outpost from the road inward, and leave if the return gains an extra patrol.
    Back to map
  8. Checkpoint 8

    13+ · Horde

    The Family Crypt

    Skip
    Risk
    CaveRespawn
    Map position
    Near Agamand Mills · marker 8 at approximately 52% from the left and 24% from the top
    Failure state
    Multiple ancestors engage inside the crypt while Captain Dargol and back-respawns remove the only clean return.
    Exit call
    Skip the crypt on a solo 1-10 pass. A prepared later group turns out on the first back-respawn.
    Back to map
Before this route

Prepare the failure states

Read the lessons that match this map's terrain, group pressure, travel, and reset risks.

Levels 1-10

Finish Deathknell before moving into Brill. Tirisfal's roads are forgiving, but its caves, ruined towers, and undead camps turn one long circuit into several separate Hardcore decisions.

Keep the Mills above ground

The Mills Overrun and Deaths in the Family can be staged from the outdoor road edge. The Family Crypt is a different commitment: do not let outdoor progress pull a solo character through the crypt entrance.

Split the Scarlet campaign

The western warrior tower and the eastern officer camps are separate trips. Repair, train, and reset in Brill between them; chain progression does not make a dense tower safe.

Where next

Continue to Silverpine Forest after level 10. Train, repair, and clear bags in Brill or Undercity before taking the southwest road.
Related articles
Last updated