Zones

Un'Goro Crater

Marshal's Refuge is the only reset in the crater. Devilsaurs walk the open floor, so the danger here is the ground between objectives rather than the objectives themselves.

Buff My Pet Editorial
Classic Hardcore · safety route

Quest safety dossier

The annotated Classic map shows approximate quest-risk locations, broad hazard areas, and safe anchors. Callouts show our conservative verdict, safety level, and first risk. The lists carry the full failure state and exit call.

Swipe or scroll sideways to inspect the full map.

Map guidance

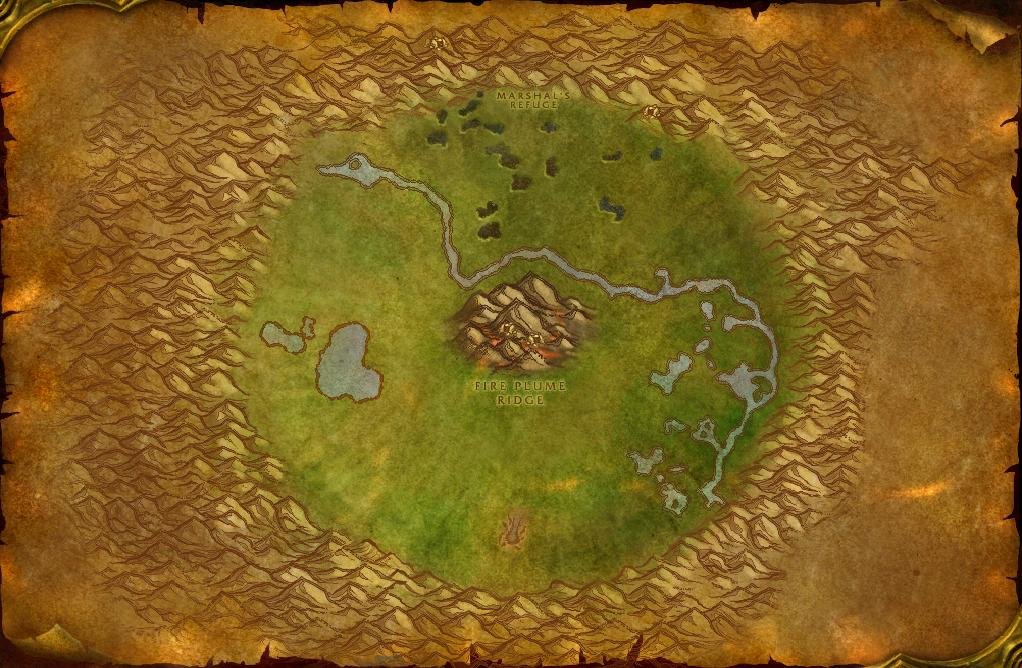
The Classic zone map is decorative. Numbered markers match the checkpoint cards below. Hazard highlights show approximate risk corridors or areas, never exact spawn points or patrol paths; the visible zone-wide hazard list following the figure carries the equivalent warning details.

Map anchors
  • North Rim Pass (road gate)
  • Marshal's Refuge (safe hub)
  • Lakkari Tar Pits (danger area)
  • Fungal Rock (cave)
  • Fire Plume Ridge (danger area)
  • Golakka Springs (danger area)
  • Terror Run (danger area)
  • Slithering Scar (cave)
  • Eastern Marsh (danger area)

Annotated Classic zone map. Quest callouts give a short checkpoint label, verdict, safety level, and first listed risk; +N means the card lists more risks. Hazard highlights mark approximate risk corridors or areas, not exact spawn points or patrol paths. Connection relationships are not drawn as navigation lines. Come in through the north rim pass and keep Marshal's Refuge as the only reset. Take the northern floor and the tar bed edges first, work Fire Plume Ridge from the base, and keep Terror Run, the Slithering Scar, and the eastern reaches on separate trips. Confirm exact navigation in game. Numbered markers match the ordered checklist below.

  • Do now
  • Return later
  • Bring a group
  • Skip
Persistent threats

Zone-wide hazards

Map highlights are approximate risk areas or corridors. Use these static warnings for the complete call and confirm the threat in game.

  • Warning

    52-56 · Both

    Devilsaur ground

    Map label: Devilsaur ground

    Risk
    AmbushPatrol
    Area
    The open grass west and south of Fire Plume Ridge, from Golakka Springs down through Terror Run to the flats above the Slithering Scar. Nothing there breaks line of sight, and the largest beasts walk lines of their own rather than sitting in camps.
    Failure state
    A Devilsaur reaches you while you are dismounted on a power crystal, and it stays on you through the mount cast and the whole ride toward open ground.
    Exit call
    Cross the west and south with the rim wall on one side. If one turns toward you, mount before it closes and ride the wall line, never across the open middle.
    Back to map
  • Warning

    50-55 · Both

    Frenzied Pterrordax

    Map label: Frenzied Pterrordax

    Risk
    AmbushRespawn
    Area
    The ridge lines east of Fire Plume Ridge and the eastern reaches above the water, where flyers sit higher than the fight you started and come down into it.
    Failure state
    A Frenzied Pterrordax lands on a fight you already have running, and the pair holds you in combat long enough for a third to arrive from the same ridge.
    Exit call
    Pull away from ridge shadows and finish on flat ground. If a second flyer lands, break downhill immediately instead of trading with both.
    Back to map
  • Warning

    50-54 · Both

    Lakkari tar beds

    Map label: Lakkari tar beds

    Risk
    AmbushDense camp
    Area
    The black tar beds spread east and south of Marshal's Refuge. The pools sit close enough together that a shortcut between two of them is inside aggro range of both.
    Failure state
    You cut between two pools to save the ride around, and a Tar Beast from the second pool reaches you before the first one is down.
    Exit call
    Ride around the tar beds instead of through them. If one wakes while you are between pools, leave along the line you came in on rather than pushing forward.
    Back to map
  1. Checkpoint 1

    48+ · Both

    Refuge intake and the crystal contract

    Do now
    Risk
    Travel
    Map position
    Near Marshal's Refuge · marker 1 at approximately 52% from the left and 15% from the top
    Failure state
    You take the crystal contract at 47 and start filling it on the walk south, so the first thing that crosses the floor catches you dismounted on a crystal with the refuge already out of reach.
    Exit call
    If you are under 48, bank the chain at the refuge and work the northern floor along the cliff wall until the level lands, then start the crystal runs.
    Back to map
  2. Checkpoint 2

    50+ · Both

    The three crystal pylons

    Do now
    Risk
    TravelAmbush
    Map position
    Near Golakka Springs · marker 2 at approximately 29% from the left and 45% from the top
    Failure state
    The western leg walks you along the rim above Terror Run, and a Devilsaur leaves the tree line behind you while the discovery text is still on screen.
    Exit call
    Take each pylon as its own trip from the refuge. If anything enters your lane, ride the rim wall north instead of cutting back across the middle of the crater.
    Back to map
  3. Checkpoint 3

    55+ · Both

    Ringo's walk back to the refuge

    Bring a group
    Risk
    EscortTravelAmbush
    Map position
    Near Marshal's Refuge · marker 3 at approximately 48% from the left and 33% from the top
    Failure state
    Ringo faints in open ground, you stop moving to use Spraggle's Canteen, and the beast you were walking around reaches you while you are standing still over him.
    Exit call
    If anything aggros during the walk, leave Ringo where he drops, kill or lose the add well off his line, and only revive him once the lane back to the refuge is clear.
    Back to map
  4. Checkpoint 4

    53+ · Both

    Un'Goro ash and the thermometer

    Return later
    Risk
    RespawnAmbush
    Map position
    Near Fire Plume Ridge · marker 4 at approximately 46% from the left and 44% from the top
    Failure state
    The thermometer sends you up the ridge one hot spot at a time, and a fire elemental respawns behind you on a narrow shelf while you are reading a temperature.
    Exit call
    Check one hot spot per approach from the base. If anything respawns between you and the slope you came up, take the downhill line at once and re-enter from the bottom.
    Back to map
  5. Checkpoint 5

    54+ · Both

    The Gorishi hive sample

    Bring a group
    Risk
    CaveDense campRespawn
    Map position
    Near Slithering Scar · marker 5 at approximately 46% from the left and 77% from the top
    Failure state
    You reach a hatchery chamber with the hanging larval spawns, the vial takes its time, and the tunnel you walked in through has already refilled behind you.
    Exit call
    If the tunnel behind you closes before you find a hatchery, leave the Scar with the vial unused and come back with a partner who holds the mouth.
    Back to map
  6. Checkpoint 6

    54+ · Both

    Fungal Rock pelts and U'cha

    Return later
    Risk
    CaveDense camp
    Map position
    Near Fungal Rock · marker 6 at approximately 59% from the left and 16% from the top
    Failure state
    You take the pelt count inside the rock instead of on the outside slope, and a second Un'Goro Thunderer walks into the fight in a tunnel with one way out.
    Exit call
    Take Gorilla, Stomper, and Thunderer pelts from single spawns on the slope. If a second ape joins you inside Fungal Rock, leave by the mouth you entered and reset outside.
    Back to map
  7. Checkpoint 7

    52+ · Both

    Pterrordax counts and webbed scales

    Do now
    Risk
    AmbushPatrol
    Map position
    Near Eastern Marsh · marker 7 at approximately 62% from the left and 42% from the top
    Failure state
    You take a Pterrordax on the ground, a Frenzied Pterrordax drops on you from the ridge above, and the pair holds you in place until a Diemetradon walks up from the water.
    Exit call
    Fight the birds on flat ground away from the ridge and the shoreline. If a second one lands before the first is dead, break away from the water and finish in the open.
    Back to map
  8. Checkpoint 8

    50+ · Both

    The Bloodpetal harvest

    Do now
    Risk
    AmbushRespawn
    Map position
    Near Eastern Marsh · marker 8 at approximately 58% from the left and 63% from the top
    Failure state
    You pull one plant out of a cluster of four, the neighbours wake on the same tick, and the Trapper keeps its damage on you while you try to walk clear of the rest.
    Exit call
    Take plants that stand alone and pull them outward. If a second one wakes, walk straight to open grass and let everything fall off before you touch the cluster again.
    Back to map
  9. Checkpoint 9

    56+ · Both

    The Lar'korwi hunt

    Bring a group
    Risk
    AmbushPatrol
    Map position
    Near Slithering Scar · marker 9 at approximately 57% from the left and 71% from the top
    Failure state
    You drop the bait with a Ravasaur still on its patrol line, and Lar'korwi arrives on top of you at the same moment the patrol turns back into the clearing.
    Exit call
    Clear and hold one patch of ground before you use Torwa's pouch. If a Ravasaur re-enters the clearing while the summon is up, break off and take the fight to cleared ground.
    Back to map
  10. Checkpoint 10

    56+ · Both

    Blazerunner and the Golden Flame

    Skip
    Risk
    EliteCaveDense camp
    Map position
    Near Fire Plume Ridge · marker 10 at approximately 56% from the left and 50% from the top
    Failure state
    You strip Blazerunner's aura with the totem, the fight runs long inside the cave, and the elementals between you and the mouth are back up before you can walk out with the flame.
    Exit call
    Leave the Golden Flame unclaimed until you have a group. If you are already inside when the adds come back, run the cave mouth line and do not fight back up the slope.
    Back to map
Before this route

Prepare the failure states

Read the lessons that match this map's terrain, group pressure, travel, and reset risks.

Levels 48-55

Un'Goro opens around 48, but the crater punishes travel more than it punishes pulls. Marshal's Refuge is the only reset worth planning around, and the open floor between objectives carries the things that kill a hardcore character.

What kills characters here

  • Devilsaurs: they roam the open grass and hit far above the quest level. They are a travel problem, not a fight.

  • Pterrordax: flyers sit above the ground you pull on and drop into a fight already in progress.

  • Tar beds: the Lakkari pools sit close enough together that a shortcut between two of them is inside aggro range of both.

Plan the trips

  • Come in through the north rim pass and bank at Marshal's Refuge before taking any objective.

  • Take the northern floor and tar bed edges first. They are the shortest returns to the Refuge.

  • Keep Terror Run and the Slithering Scar as separate trips. Neither has a safe line back across the floor.

The reset is the plan

A Devilsaur on the open floor removes the exit before the fight starts. Cross the crater on the rim, not through the middle.

Related articles
Last updated