Zones

Desolace

Desolace has long runs between scattered camps, so a broken pull can leave the character far from help or a quick reset.

Buff My Pet Editorial
Classic Hardcore · safety route

Quest safety dossier

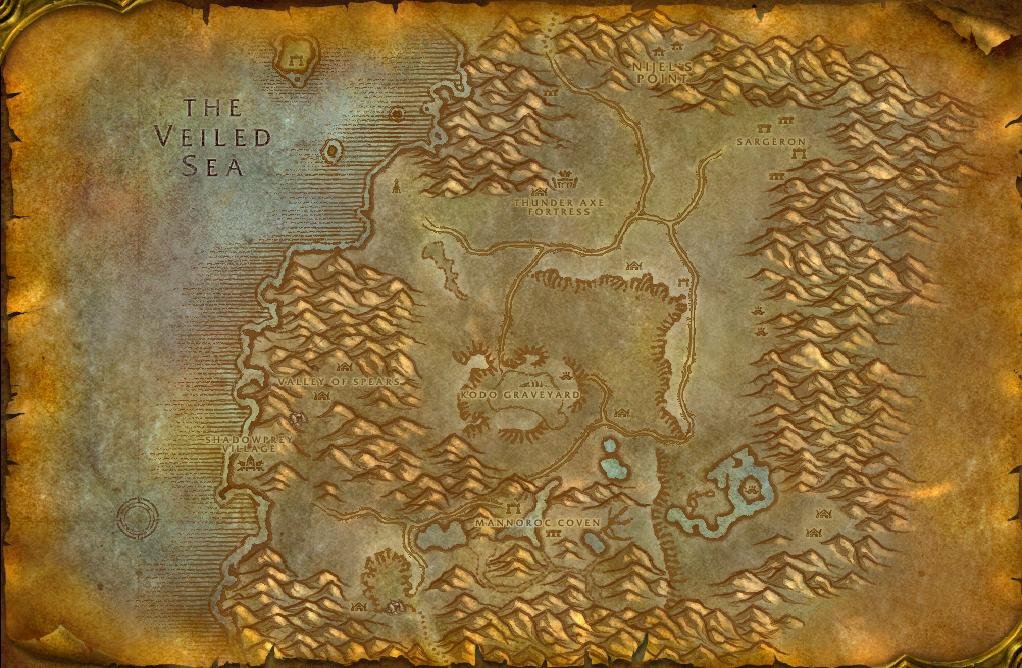
The annotated Classic map shows approximate quest-risk locations, broad hazard areas, and safe anchors. Callouts show our conservative verdict, safety level, and first risk. The lists carry the full failure state and exit call.

Swipe or scroll sideways to inspect the full map.

Map guidance

The Classic zone map is decorative. Numbered markers match the checkpoint cards below. Hazard highlights show approximate risk corridors or areas, never exact spawn points or patrol paths; the visible zone-wide hazard list following the figure carries the equivalent warning details.

Map anchors
  • Nijel's Point (safe hub)
  • Sar'theris Strand (coast)
  • Ethel Rethor (coast)
  • Thunder Axe (danger area)
  • Sargeron (danger area)
  • Kormek's Hut (camp)
  • Kolkar road (road gate)
  • Ghost Walker Post (safe hub)
  • Kodo Graveyard (danger area)
  • Scrabblescrew Camp (camp)
  • Magram Village (danger area)
  • Mannoroc Coven (danger area)
  • Gelkis Village (danger area)
  • Valley of Spears (danger area)
  • Shadowprey (safe hub)

Annotated Classic zone map. Quest callouts give a short checkpoint label, verdict, safety level, and first listed risk; +N means the card lists more risks. Hazard highlights mark approximate risk corridors or areas, not exact spawn points or patrol paths. Connection relationships are not drawn as navigation lines. Two hubs, one long walk between them. Anchor on Nijel's Point or Shadowprey Village, clear one road at a time, and treat the centaur villages, Mannoroc Coven, and the Maraudine valley as separate prepared trips instead of one loop. Confirm exact navigation in game. Numbered markers match the ordered checklist below.

  • Do now
  • Return later
  • Bring a group
  • Skip
Persistent threats

Zone-wide hazards

Map highlights are approximate risk areas or corridors. Use these static warnings for the complete call and confirm the threat in game.

  • Warning

    32-38 · Both

    Kolkar road packs

    Map label: Kolkar road packs

    Risk
    PatrolDense campRunners
    Area
    The centaur ground on both sides of the north-south road between Kormek's Hut and Scrabblescrew's Camp, which is also the lane the Gizelton Caravan runs.
    Failure state
    A Kolkar Mauler and a Scout answer the same pull off the roadside, and the fight drifts downhill away from the road into a second camp.
    Exit call
    Ride the road instead of cutting the corners. If a runner leaves the fight, step back onto the road and let it go rather than following it into the camp.
    Back to map
  • Warning

    40+ · Both

    Maraudine valley

    Map label: Maraudine valley

    Risk
    EliteDense campTravel
    Area
    The Valley of Spears east of Shadowprey Village and the Maraudon canyon mouth at its southwestern end.
    Failure state
    You cut the valley to shorten the ride between Shadowprey Village and the Kodo Graveyard, take a Maraudine pull in the mid thirties, and have canyon wall on three sides.
    Exit call
    Route around the valley on the southern road. If something commits while you are inside it, leave west toward Shadowprey Village rather than pushing south to the canyon.
    Back to map
  • Warning

    38-40 · Alliance

    Sargeron ravager belt

    Map label: Sargeron ravagers

    Risk
    UndeadRespawnAmbush
    Area
    The broken ruins around Sargeron and the bone ground southeast of Nijel's Point, where the Undead Ravager count gets farmed.
    Failure state
    Thirty Undead Ravagers is a long count, the belt refills behind you, and you take the last few pulls at half health because no drink ever finishes.
    Exit call
    Split the count into two trips with a rest at Nijel's Point between them. If a second ravager reaches you mid-drink, walk west out of the ruins before you fight it.
    Back to map
  • Warning

    38-40 · Both

    Mannoroc demon field

    Map label: Mannoroc demon field

    Risk
    ElitePatrolDense camp
    Area
    The open demon ground on the western and northern edge of Mannoroc Coven, crossed by anyone farming felhound, nether, or doomwarder drops.
    Failure state
    A doomwarder joins a felhound fight on flat ground and there is nothing between you and the next portal ring to break the second pull.
    Exit call
    Farm the outer edge with the road behind you. On any second demon, leave north and count the drop as unfarmed.
    Back to map
  1. Checkpoint 1

    33-38 · Both

    Azore's tower at Ethel Rethor

    Do now
    Risk
    TravelAmbushRespawn
    Map position
    Near Ethel Rethor · marker 1 at approximately 36% from the left and 31% from the top
    Failure state
    You collect the Sceptre of Light and the Book of the Ancients on one pass, drop off the ruin shelf onto the strand below, and the shoreline pack cuts the climb back to Azore Aldamort.
    Exit call
    Work the ruins from the inland side with the tower in view. If anything joins from the water line, climb back to the tower and reset there instead of running the beach.
    Back to map
  2. Checkpoint 2

    38+ · Alliance

    The Karnitol Shipwreck

    Return later
    Risk
    TravelAmbushRespawn
    Map position
    Near Ethel Rethor · marker 2 at approximately 33% from the left and 38% from the top
    Failure state
    You search for Karnitol's Chest at 33, the beach closes behind you while you are stopped on the wreck, and the run back east to Nijel's Point is open ground the whole way.
    Exit call
    Come back when the strand is green and Kreldig Ungor's follow-ups are the only reason to be there. If the sand fills behind you, leave east up the slope, never north along the water.
    Back to map
  3. Checkpoint 3

    35+ · Alliance

    Vahlarriel's Search and the Dalinda escort

    Bring a group
    Risk
    EscortDense campRunnersPatrol
    Map position
    Near Thunder Axe · marker 3 at approximately 52% from the left and 31% from the top
    Failure state
    Dalinda Malem walks her own line out of Thunder Axe Fortress, a fortress add lands while she is still inside the walls, and the fight happens where the courtyard can feed it.
    Exit call
    Clear the exit lane before you speak to her, and bring a partner for the walls. If two adds land before she clears the gate, drop the escort and leave down the south slope.
    Back to map
  4. Checkpoint 4

    35-37 · Horde

    Shadowprey shore work

    Do now
    Risk
    Dense campPatrolAmbush
    Map position
    Near Shadowprey · marker 4 at approximately 24% from the left and 62% from the top
    Failure state
    A Slitherblade Sorceress adds from the water while you are on a Myrmidon, and the fight walks north up the sand into the next camp instead of back toward the village.
    Exit call
    Pull from the sand with Shadowprey Village behind you and clam meat picked up on the same lap. On a Sorceress add, walk south to the village rather than out into the shallows.
    Back to map
  5. Checkpoint 5

    34-39 · Both

    The Kodo Graveyard lap

    Do now
    Risk
    UndeadEscortRespawnAmbush
    Map position
    Near Kodo Graveyard · marker 5 at approximately 50% from the left and 63% from the top
    Failure state
    You put the Kodo Kombobulator on a kodo, walk it back across the basin toward Scrabblescrew's Camp, and the ghosts you stepped around on the way in path onto you while the kodo keeps moving.
    Exit call
    Take bones, Ghost-o-plasms, and one kodo per lap, not all three at once. If a second ghost joins, leave the basin uphill toward Ghost Walker Post and let the kodo go.
    Back to map
  6. Checkpoint 6

    35-37 · Both

    Warug's side of the centaur war

    Do now
    Risk
    Dense campRunnersTravel
    Map position
    Near Magram Village · marker 6 at approximately 78% from the left and 77% from the top
    Failure state
    Khan Shaka dies deep in Gelkis ground and the ride back east to Warug crosses the whole zone with a hostile village at each end.
    Exit call
    Pick Magram before the first turn-in, then run the head back on the road, not over the ridges. If a Gelkis pack picks you up on the way out, break north to the road and keep riding.
    Back to map
  7. Checkpoint 7

    35-37 · Both

    Uthek's side of the centaur war

    Skip
    Risk
    Dense campTravelRunners
    Map position
    Near Gelkis Village · marker 7 at approximately 36% from the left and 86% from the top
    Failure state
    You bank Warug's reputation first and then start Uthek the Wise's chain anyway, so both villages turn hostile while you are in the southwest corner with the longest walk out.
    Exit call
    Run one clan for the whole zone. If Warug is already friendly, leave Uthek the Wise alone and take the same rewards from the Magram side.
    Back to map
  8. Checkpoint 8

    39+ · Both

    Get Me Out of Here!

    Bring a group
    Risk
    EscortDense campRunnersPatrol
    Map position
    Near Magram Village · marker 8 at approximately 68% from the left and 68% from the top
    Failure state
    Melizza Brimbuzzle leaves her cage inside Magram Village and walks past camps you never cleared, so a second centaur lands on her while you are still tied up with the first.
    Exit call
    Clear the western lane out of the village before you free her, and bring a partner to hold the rear. If she pulls a camp you have not cleared, let the escort fail and leave.
    Back to map
  9. Checkpoint 9

    38+ · Both

    The Gizelton Caravan escorts

    Bring a group
    Risk
    EscortEventRespawnTravel
    Map position
    Near Scrabblescrew Camp · marker 9 at approximately 56% from the left and 70% from the top
    Failure state
    The wagons keep rolling while Kolkar hit the kodos, so the second wave lands on you on open road with the caravan already past your reset.
    Exit call
    Take the tag only with a partner on the rear wagon and Smeed Scrabblescrew's camp as the reset. If a wave lands while the first is still alive, step off the road and let the run fail.
    Back to map
  10. Checkpoint 10

    38-40 · Horde

    Portals of the Legion and The Corrupter

    Bring a group
    Risk
    EliteDense campRespawnPatrol
    Map position
    Near Mannoroc Coven · marker 10 at approximately 56% from the left and 81% from the top
    Failure state
    You stand still on the sixth portal, a patrol closes from the next ring, and Lord Azrethoc's ground gives you nothing to back into.
    Exit call
    Banish one portal per approach from the outer ring, and save Lord Azrethoc and Jugkar Grim'rod for a group. If a second demon commits during a banish, leave north to the road.
    Back to map
Before this route

Prepare the failure states

Read the lessons that match this map's terrain, group pressure, travel, and reset risks.

Levels 30-40

Enter around 32, when the opening camps are within the character’s level range.

Distance limits recovery

  • Isolation: camps are spread out. A broken pull leaves help far away.

  • Kolkar and Magram centaur: dense camps with runners. Pull from the edge of the camp.

  • Kodo Graveyard: vultures and ghosts overlap. One target can become three quickly.

Plan for the road

  • Take the flight path early. Walking Desolace takes time and limits a quick return after a broken pull.

  • Do Centaur quests one camp at a time. Return for the next camp after the first is clear.

A broken pull has a long reset

Desolace can turn one broken pull into a long run back through scattered camps.

Last updated