Zones

Elwynn Forest

Finish Northshire before Goldshire, treat each mine as its own trip, and bring a group for the Brackwell names and Hogger.

Buff My Pet Editorial
Classic Hardcore · safety route

Quest safety dossier

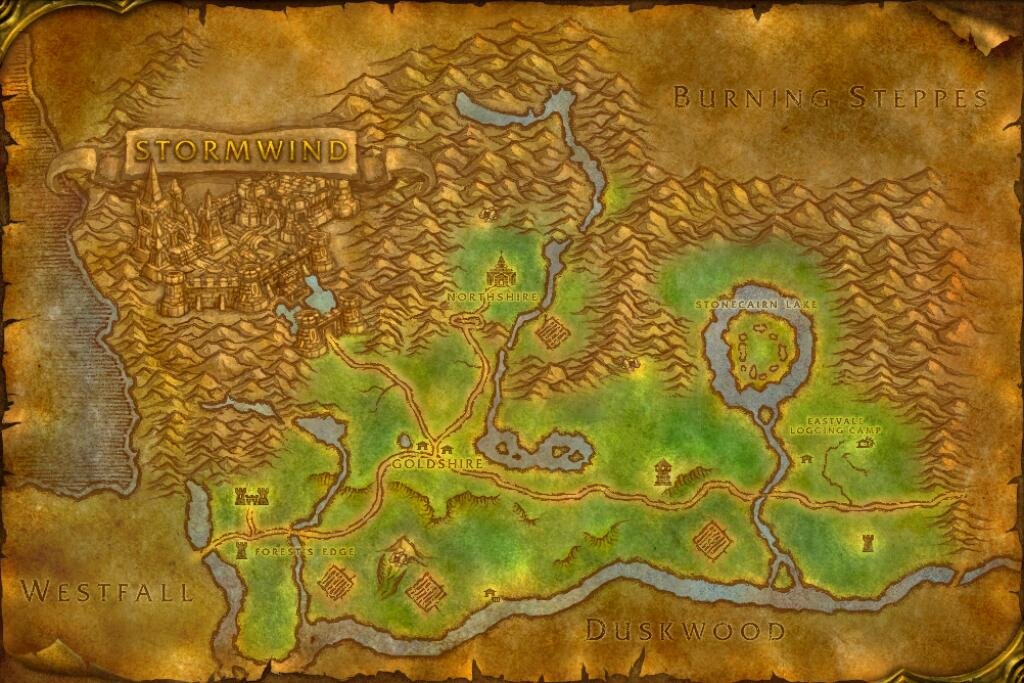
The annotated Classic map shows approximate quest-risk locations and safe anchors. Callouts show our conservative verdict, safety level, and first risk. The checklist carries the full failure state and exit call.

Swipe or scroll sideways to inspect the full map.

Map guidance

The Classic zone map is decorative. Numbered markers match the cards below; every card names its explicitly reviewed map anchor and approximate relative position.

Map anchors
  • Northshire Abbey (safe hub)
  • Goldshire (safe hub)
  • Fargodeep Mine (cave)
  • Jasperlode Mine (cave)
  • Stone Cairn Lake (danger area)
  • Eastvale Camp (camp)
  • Brackwell Patch (danger area)
  • Westbrook (safe hub)
  • Westfall Gate (road gate)
  • Hogger Grounds (danger area)

Annotated Classic zone map. Quest callouts give a short checkpoint label, verdict, safety level, and first listed risk; +N means the card lists more risks. Marker positions identify approximate quest-risk areas, not exact spawn points. Connection relationships are not drawn as navigation lines. Finish Northshire before Goldshire. Treat Fargodeep, Jasperlode, Stone Cairn Lake, Brackwell Pumpkin Patch, and Hogger as separate out-and-back trips. Checkpoint markers are approximate risk areas, not exact spawns or safe paths. Confirm exact navigation in game. Numbered markers match the ordered checklist below.

  • Do now
  • Return later
  • Bring a group
  • Skip
  1. Checkpoint 1

    8+ · Alliance

    Fargodeep Mine loop

    Return later
    Risk
    CaveRespawn
    Map position
    Near Fargodeep Mine · marker 1 at approximately 33% from the left and 77% from the top
    Failure state
    A worker respawns behind you while the next miner blocks the bend toward the entrance.
    Exit call
    Leave through the last cleared bend as soon as the entrance route stops being empty.
    Back to map
  2. Checkpoint 2

    9+ · Alliance

    Goldtooth

    Bring a group
    Quest
    Goldtooth
    Risk
    CaveRespawn
    Map position
    Near Fargodeep Mine · marker 2 at approximately 44% from the left and 76% from the top
    Failure state
    Goldtooth joins with another kobold while the cleared tunnel begins to refill.
    Exit call
    Do not push deeper for the tag. Turn for the entrance before the group loses the cleared lane.
    Back to map
  3. Checkpoint 3

    10+ · Alliance

    The Jasperlode Mine

    Skip
    Risk
    CaveRespawn
    Map position
    Near Jasperlode Mine · marker 3 at approximately 66% from the left and 58% from the top
    Failure state
    The scout trigger sits beyond bends that can refill before you turn back.
    Exit call
    Skip the cave when it is not already controlled. The exploration reward does not buy a clean retreat.
    Back to map
  4. Checkpoint 4

    9+ · Alliance

    A Bundle of Trouble

    Do now
    Risk
    PatrolTravel
    Map position
    Near Eastvale Camp · marker 4 at approximately 76% from the left and 61% from the top
    Failure state
    A prowler or bear closes from behind while you stop at the next bundle.
    Exit call
    Collect from the camp edge and reset to Eastvale after any unplanned animal joins.
    Back to map
  5. Checkpoint 5

    10+ · Alliance

    Stone Cairn murlocs

    Return later
    Risk
    Dense campRunners
    Map position
    Near Stone Cairn Lake · marker 5 at approximately 82% from the left and 56% from the top
    Failure state
    A low-health murloc reaches another hut while a shoreline add closes the open side.
    Exit call
    Break south toward Guard Thomas before following a runner between the huts.
    Back to map
  6. Checkpoint 6

    10+ · Alliance

    Brackwell named targets

    Bring a group
    Risk
    Dense campRespawn
    Map position
    Near Brackwell Patch · marker 6 at approximately 64% from the left and 76% from the top
    Failure state
    Princess arrives with her entourage or a Defias respawn joins the Collector pull.
    Exit call
    Clear one target lane with a group. Leave the patch when either named pull gains an extra.
    Back to map
  7. Checkpoint 7

    11+ · Alliance

    Wanted: Hogger

    Bring a group
    Risk
    EliteDense camp
    Map position
    Near Hogger Grounds · marker 7 at approximately 23% from the left and 97% from the top
    Failure state
    Hogger survives the first control window while another Riverpaw joins the fight.
    Exit call
    Bring a group, clear the nearby gnolls first, and abandon the pull before adds close the route to Westbrook.
    Back to map
Before this route

Prepare the failure states

Read the lessons that match this map's terrain, group pressure, travel, and reset risks.

Levels 1-10

Finish the Northshire quests before moving to Goldshire. The open roads are forgiving. The mines, murloc huts, and named camps remove that room quickly.

Make each mine one trip

The Fargodeep Mine shares its route with the candle and gold-dust work. Return with level room, turn around on the first back-respawn, and bring help before pushing to Goldtooth. Leave The Jasperlode Mine alone when the cave is not already controlled.

Keep the east in short returns

A Bundle of Trouble stays near Eastvale and works as an open-ground stop. The Stone Cairn murlocs and Brackwell Pumpkin Patch need separate returns. Do not carry a bad pull from one camp toward the next.

Where next

Continue to Westfall after level 10, or add a second starting zone before the first Westfall camp if your key tools are still missing.
Related articles
Last updated