Zones

Darkshore

Use Auberdine as the reset point, split the northern wreck, cave, and furbolg work into separate trips, and bring help for the southern events and escorts.

Buff My Pet Editorial
Classic Hardcore · safety route

Quest safety dossier

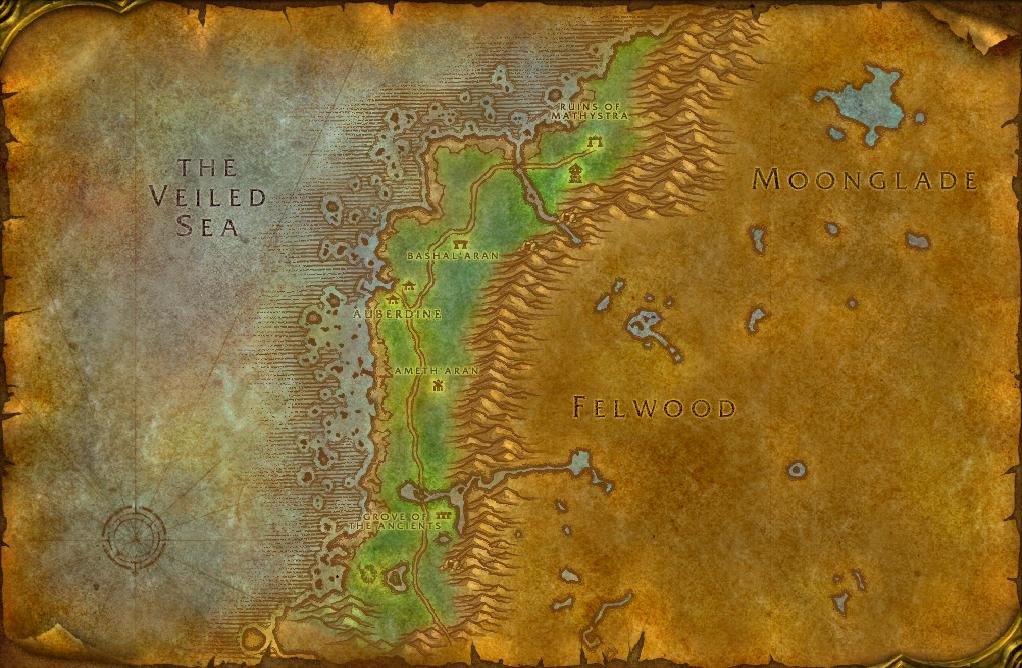
The annotated Classic map shows approximate quest-risk locations, broad hazard areas, and safe anchors. Callouts show our conservative verdict, safety level, and first risk. The lists carry the full failure state and exit call.

Swipe or scroll sideways to inspect the full map.

Map guidance

The Classic zone map is decorative. Numbered markers match the checkpoint cards below. Hazard highlights show approximate risk corridors or areas, never exact spawn points or patrol paths; the visible zone-wide hazard list following the figure carries the equivalent warning details.

Map anchors
  • Auberdine (safe hub)
  • Cliffspring road (road gate)
  • Ameth'Aran (danger area)
  • Grove of Ancients (safe hub)
  • Remtravel dig (camp)

Annotated Classic zone map. Quest callouts give a short checkpoint label, verdict, safety level, and first listed risk; +N means the card lists more risks. Hazard highlights mark approximate risk corridors or areas, not exact spawn points or patrol paths. Connection relationships are not drawn as navigation lines. Use Auberdine as the reset point. Treat the northern wrecks, Cliffspring cave, Blackwood camp, southern beach, and escort sites as separate commitments. The Moonstalker samples show a broad risk area, not exact spawns or a patrol path. Confirm exact navigation in game. Numbered markers match the ordered checklist below.

  • Do now
  • Return later
  • Bring a group
  • Skip
Persistent threats

Zone-wide hazards

Map highlights are approximate risk areas or corridors. Use these static warnings for the complete call and confirm the threat in game.

  • Warning

    17–18 · Alliance

    Moonstalker Sires

    Map label: Moonstalker Sires

    Risk
    AmbushTravel
    Area
    Southern Darkshore between Ameth'Aran, the Grove, and the Ashenvale border
    Failure state
    A Sire pounces during another beast pull, then Sprint closes the attempted disengage through the trees.
    Exit call
    Locate or isolate the Sire before starting a bear pull; if one joins, use hard control and retreat through already-cleared ground.
    Back to map
  1. Checkpoint 1

    13+ · Alliance

    The Fall of Ameth'Aran

    Do now
    Risk
    UndeadDense campRespawn
    Map position
    Near Ameth'Aran · marker 1 at approximately 43% from the left and 61% from the top
    Failure state
    A Highborne spirit or refill reaches the tablet interaction while the westward return to the road is occupied.
    Exit call
    Cancel the interaction and reset toward the road before moving to the second tablet.
    Back to map
  2. Checkpoint 2

    14+ · Alliance

    Plagued Lands

    Do now
    Risk
    EventTravel
    Map position
    Near Grove of Ancients · marker 2 at approximately 37% from the left and 66% from the top
    Failure state
    The trap attempt is interrupted while another beast joins the captured bear.
    Exit call
    Choose an isolated bear beside a cleared strip; on an add or failed trap, disengage and request another trap instead of forcing the capture.
    Back to map
  3. Checkpoint 3

    17+ · Alliance

    Deep Ocean, Vast Sea

    Skip
    Risk
    TravelDense camp
    Map position
    Near Auberdine · marker 3 at approximately 39% from the left and 28% from the top
    Failure state
    A murloc engages inside a wreck while the surface opening and breath margin are disappearing.
    Exit call
    Leave the wrecks untouched on this route; if engaged, stop the interaction and surface through the same opening.
    Back to map
  4. Checkpoint 4

    18+ · Alliance

    Cave Mushrooms

    Bring a group
    Risk
    CaveRespawnDense camp
    Map position
    Near Cliffspring road · marker 4 at approximately 57% from the left and 32% from the top
    Failure state
    The entrance refills while the group is committed to the Death Cap pocket among the naga.
    Exit call
    Turn on the first back-respawn; do not push deeper with an occupied exit.
    Back to map
  5. Checkpoint 5

    18+ · Alliance

    Tharnariun's Hope

    Bring a group
    Risk
    CaveDense camp
    Map position
    Near Cliffspring road · marker 5 at approximately 52% from the left and 41% from the top
    Failure state
    The Den Mother and several cubs join one pull while the cave entrance is still occupied.
    Exit call
    Retreat down the entrance slope while it remains clear and reset the complete pack.
    Back to map
  6. Checkpoint 6

    19+ · Alliance

    WANTED: Murkdeep!

    Bring a group
    Risk
    EventDense campRespawn
    Map position
    Near Grove of Ancients · marker 6 at approximately 36% from the left and 76% from the top
    Failure state
    Camp respawns arrive between waves or the final Murkdeep pair reaches the group before recovery.
    Exit call
    Let the event reset and retreat north along cleared beach on any refill.
    Back to map
  7. Checkpoint 7

    19+ · Alliance

    The Blackwood Corrupted

    Return later
    Risk
    Dense campEventRespawn
    Map position
    Near Cliffspring road · marker 7 at approximately 50% from the left and 32% from the top
    Failure state
    Xabraxxis appears while a furbolg or camp refill still owns the bonfire ring.
    Exit call
    Fill the Empty Cleansing Bowl at the Auberdine Moonwell before leaving town. At the camp, do not activate the prepared bowl until the ring and Cliffspring-side retreat are clear; reset to the river on a refill.
    Back to map
  8. Checkpoint 8

    20+ · Alliance

    Gyromast's Revenge

    Bring a group
    Risk
    EliteEvent
    Map position
    Near Cliffspring road · marker 8 at approximately 56% from the left and 14% from the top
    Failure state
    The level-20 elite activates beside a crab, murloc, or uncleared stretch of shoreline.
    Exit call
    Clear Gelkak's area first and stop short of activation if anything refills.
    Back to map
  9. Checkpoint 9

    20+ · Alliance

    The Absent Minded Prospector

    Bring a group
    Risk
    EscortEventRespawn
    Map position
    Near Remtravel dig · marker 9 at approximately 36% from the left and 84% from the top
    Failure state
    Scripted attackers stay on Remtravel while the excavation's golems refill behind the party.
    Exit call
    Take threat immediately; if the cleared lane collapses, let the escort fail and retreat north rather than chasing him deeper.
    Back to map
  10. Checkpoint 10

    20+ · Alliance

    The Sleeper Has Awakened

    Bring a group
    Risk
    EscortAmbushTravel
    Map position
    Near Grove of Ancients · marker 10 at approximately 44% from the left and 76% from the top
    Failure state
    Kerlonian sleeps out of horn range or runs into a caster while a road ambush splits the group.
    Exit call
    Keep the horn ready and remain together; abandon the attempt and reset toward the Grove if the first ambush splits the group.
    Back to map
Before this route

Prepare the failure states

Read the lessons that match this map's terrain, group pressure, travel, and reset risks.

Levels 10-20

Make Auberdine the reset point. Darkshore is long and narrow, so a safe level range does not make the northern cave, southern events, and cross-zone escorts one continuous route.

Take the bounded wins first

The Fall of Ameth'Aran has two tablet interactions with a westward reset. Plagued Lands supplies another trap after a failed bear capture. Do these only from cleared open ground and leave when an interaction attracts a second target.

Split the northern commitments

Deep Ocean, Vast Sea puts both objectives inside submerged wrecks. Cave Mushrooms enters the Cliffspring naga cave, while The Blackwood Corrupted first requires filling the Empty Cleansing Bowl at Auberdine's Moonwell, then ends with a bonfire summon in a furbolg camp. Tharnariun's Hope adds the Den Mother cave, and Gyromast's Revenge turns a passive-looking robot into an elite fight. Return to Auberdine between these commitments; progress in one does not create a safe exit from the next.

Treat events and escorts as starts

WANTED: Murkdeep! can turn a cleared camp into successive waves. The Absent Minded Prospector and The Sleeper Has Awakened begin moving once accepted. Clear first, assign who protects the NPC, and decline the start when the route or group is not ready.

Where next

Move into Ashenvale only when the low-20s track is appropriate for your faction and level. Rotate to Loch Modan or Westfall instead when Darkshore's remaining cards depend on a group.
Related articles
Last updated